Terms to Know
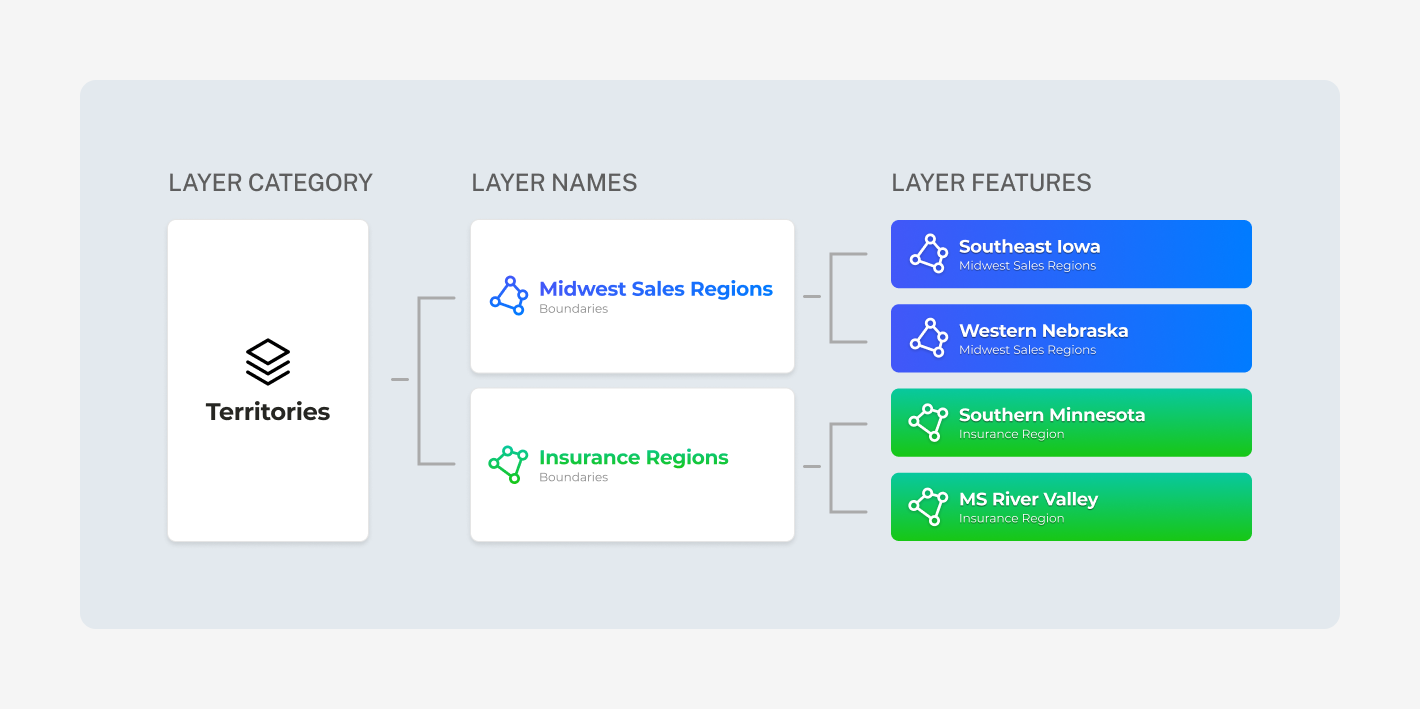
- Layer Category: The Layer is the category under which the features will exist. Some layer examples could be: Territories, Weather Events, Water Districts, and Office Locations to name a few.
- Layer Name: Assign a more defined name for the map layer. The Layer Name can be toggled on or off on the map.
- Features: Layer features is where you actually define the boundaries and further define the feature. When you enable a Layer Name, all Features added to that Layer Name will appear on the map.
Please review the Planning Your Custom Map Layers guide before getting started

On the map click to drop a point of where you want to begin drawing. Moving in a clockwise or counter-clockwise direction, continue to drop points by clicking your mouse.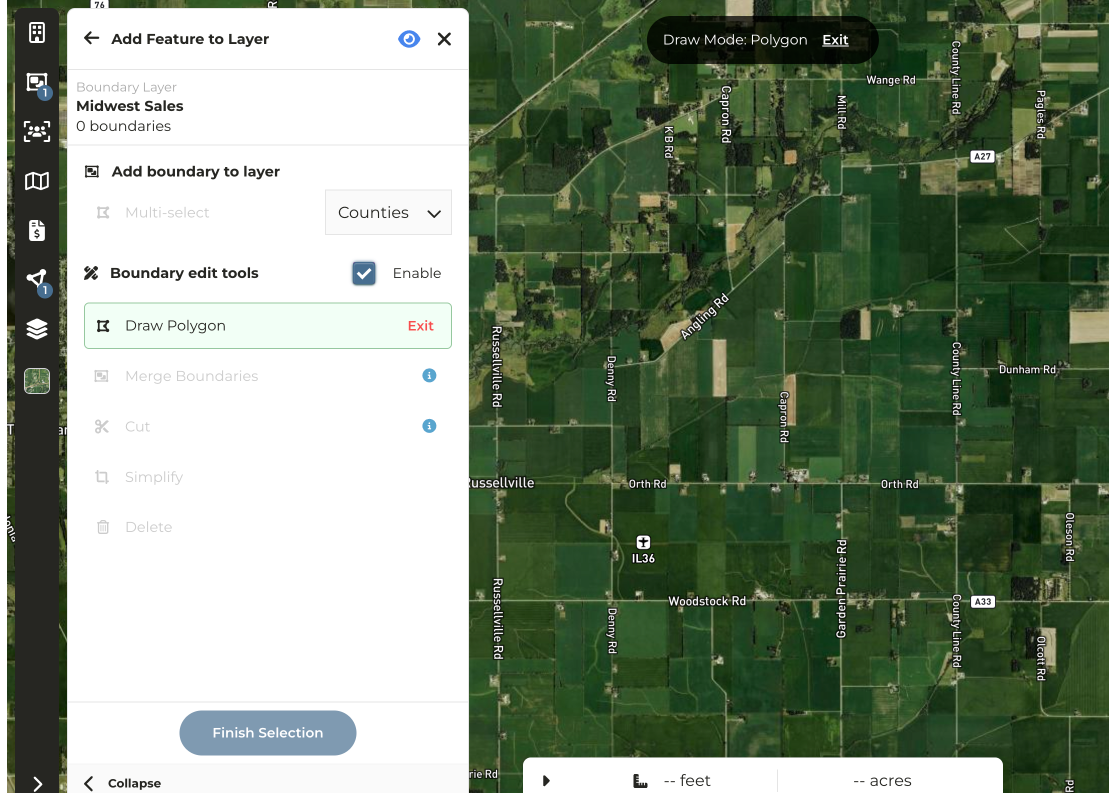
Enter a Feature Name and Color.
Note: When the Layer Name is enabled this is the color that will be assigned to this feature