When I select a state, will the county filter update to display only the counties in that state?
When I select a state, will the county filter update to display only the counties in that state?
- At this time, no. However, this is a request we have put through with the report provider, Omni.
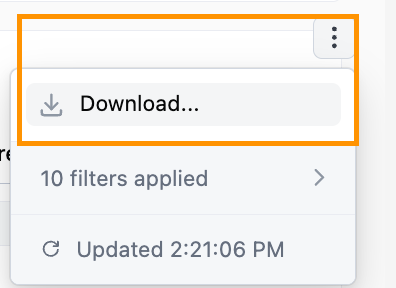
When downloading a table of data it shows "# of filters applied" but I haven't applied that many filters?
When downloading a table of data it shows "# of filters applied" but I haven't applied that many filters?
- The number displayed is the total number of filters that could be applied, not necessarily the number of filters you have applied to the report. We have shared this feedback with Omni for their consideration.
Can I download a report to excel?
Can I download a report to excel?
- Yes. A report can be downloaded to excel or into a csv file.
Selecting the Filter Expression
- Most filters are going to have a default expression selected such as “is equal to” or “contains”
- To change the filter expression click on the dropdown and either select one of the most frequently used expressions or click “More” (if available) and select your preferred option
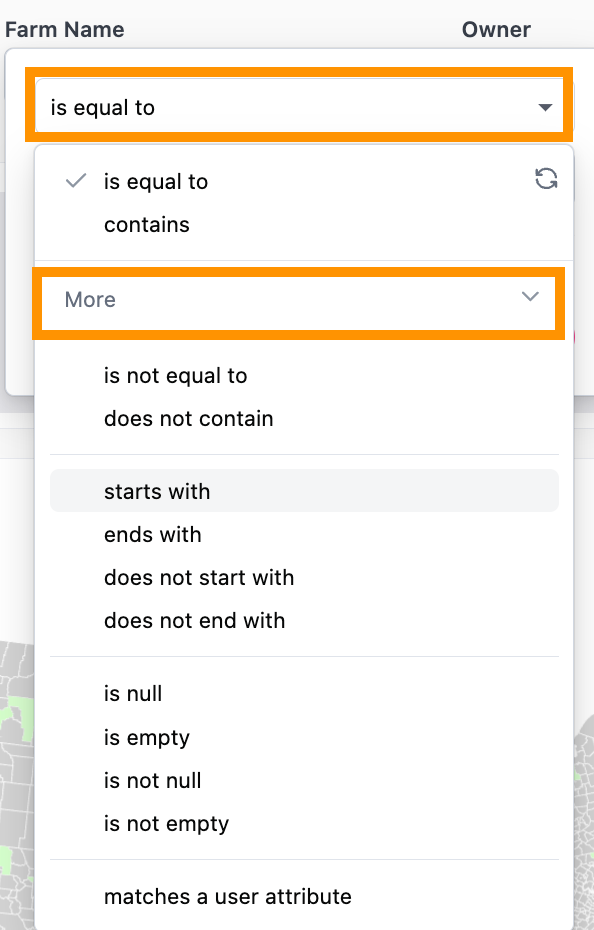
Filter Expression Definitions & Examples
Note: Only the most widely used filter expressions are listed below. If you do not see an expression that is otherwise available within a filter dropdown, it’s because it is not a widely used or useful option.
| Expression | Description | Filter Example |
|---|---|---|
| Is equal to | Will display data that exactly matches the value selected | 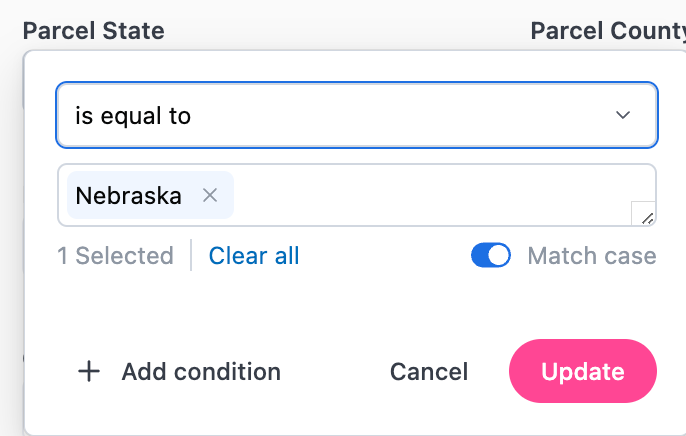 |
| is not equal to | Will exclude data that exactly matches the value selected | 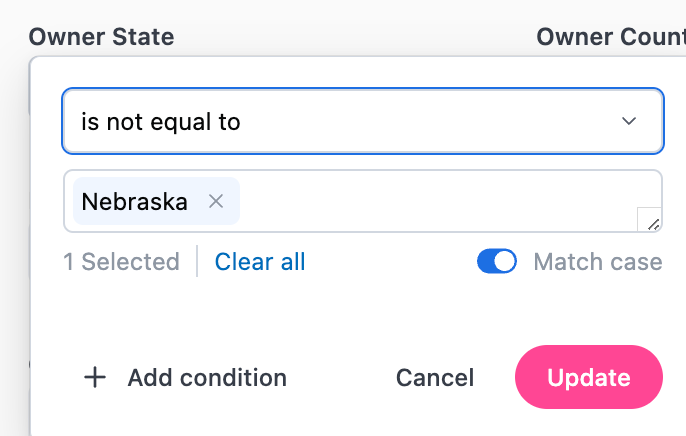 |
| contains | Will include data that contains the value selected. Note that when using “contains” other data may be included. For example, if a parcel has a second land use of “logging” it will also be included in the data set. | 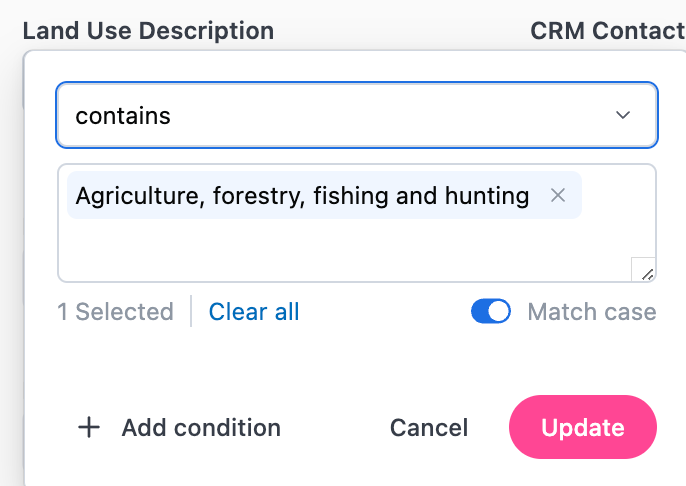 |
| does not contain | Will exclude data that contains the value(s) selected. Note that when using “does not contain” other data may be excluded. For example, if a parcel has a second land use of “agriculture” it will also be excluded from the data set. | 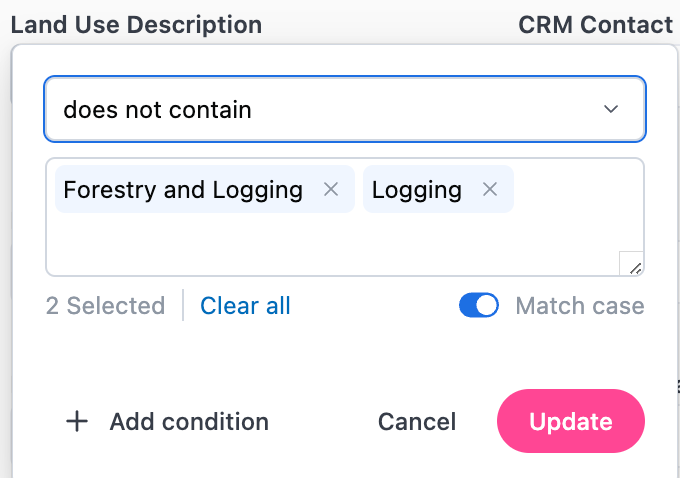 |
| starts with | Will display data that starts with the value(s) selected | 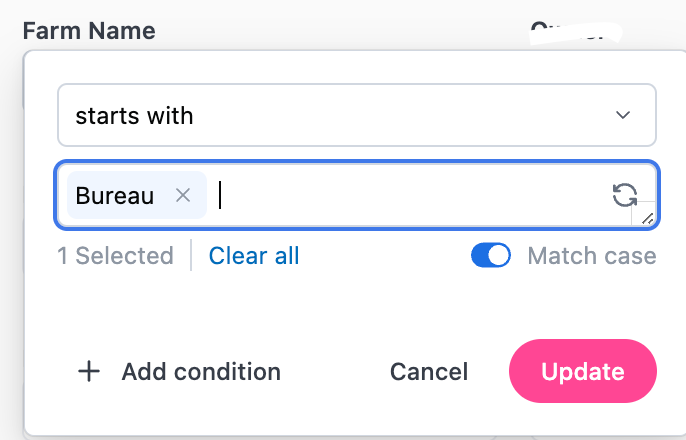 |
| is null | There is no data available to populate the data field. For example: Your organization has a CRM integration, applying “is null” to the CRM Product List filter will display data for which no Product value has been assigned in your CRM and as a result there is no data to display in CamoAg. Specific to third-party data and data sent to CamoAg from your organization. | 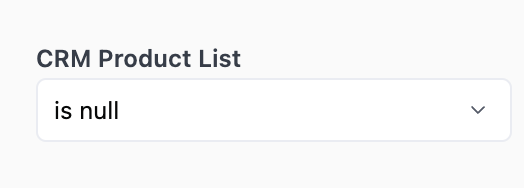 |
| is not null | Will display data for the filter selected that is populated with data. Specific to third-party data and data sent to CamoAg from your organization. | 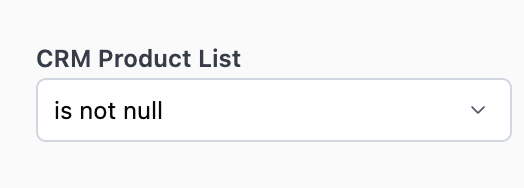 |
| is empty | Data set is empty (has zero characters). For example, you want to view farms created in your organization for which no FSA Farm Number has been entered. Specific to data manually entered by a user in your organization | 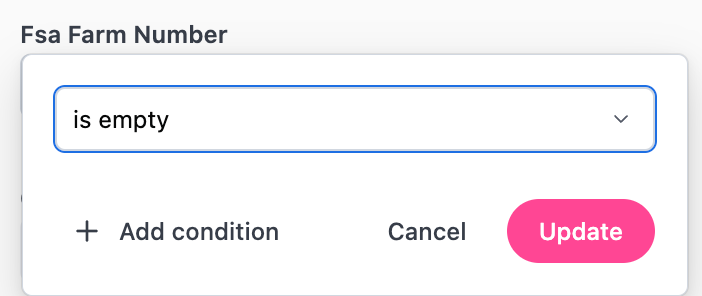 |
| is not empty | Will display data for which that particular data set is populated with information Specific to data manually entered by a user in your organization | 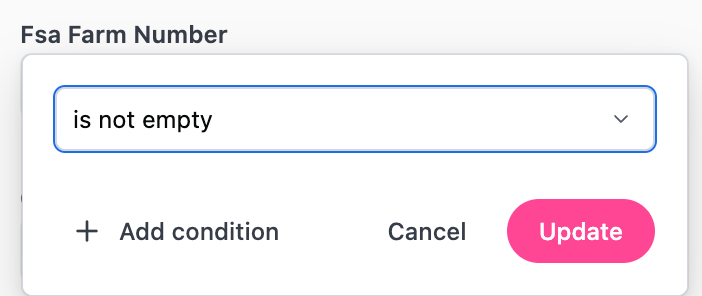 |
| is true | Typically used with the CRM filters to help filter contacts who have opted in or out of communications | 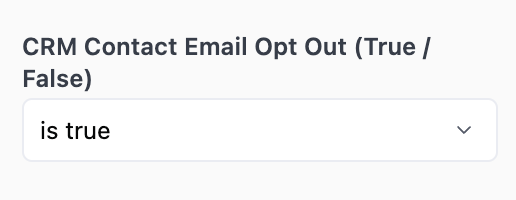 |
| is false | Typically used with the CRM filters to help filter contacts who have opted in or out of communications. Note: If a CRM filter is set to False, the data displayed will only include contacts in your CRM. | 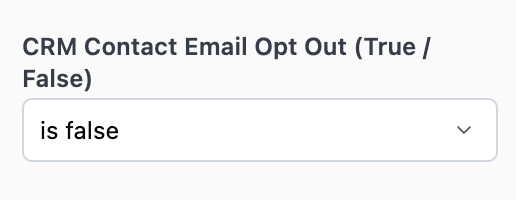 |
| is falsey (null or false) | Typically used with the CRM filters. Will pull non-contacts into the report along with contacts who meet the “false” requirement of the filter type. For example: Referring to the screenshot, setting the filter to “is falsey”, would pull in non-contacts and contacts who are not marked as deceased in your CRM. | 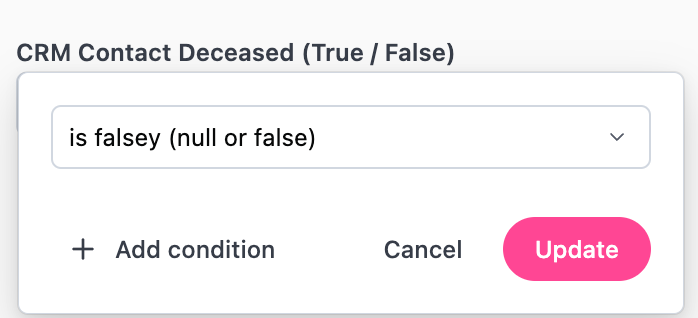 |
- Once you’ve selected your preferred filter expression, you can then select the value(s) you want to include or exclude in your search
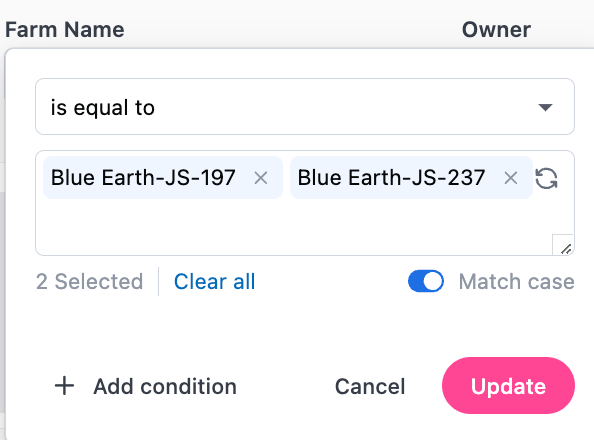
- Additional conditions can be added if needed by clicking Add Condition
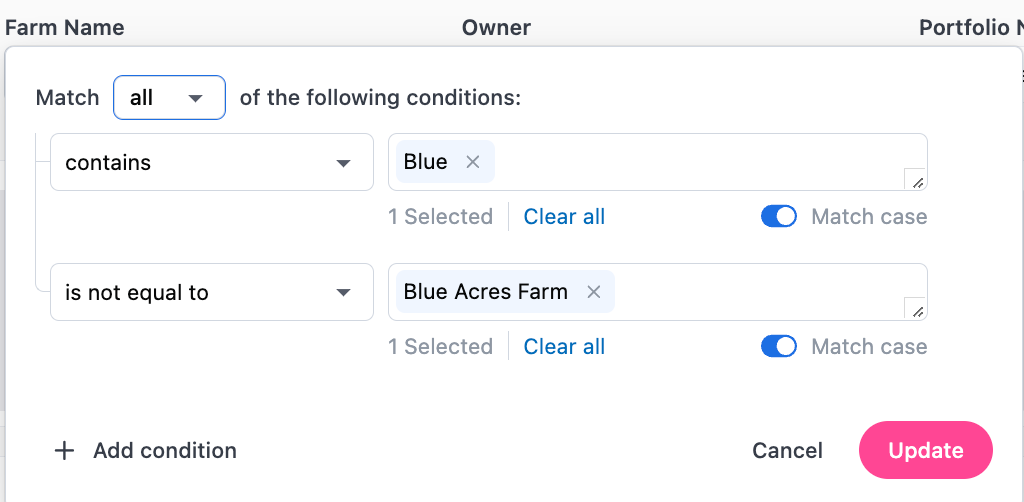
- Click Update once you have selected all filters and values
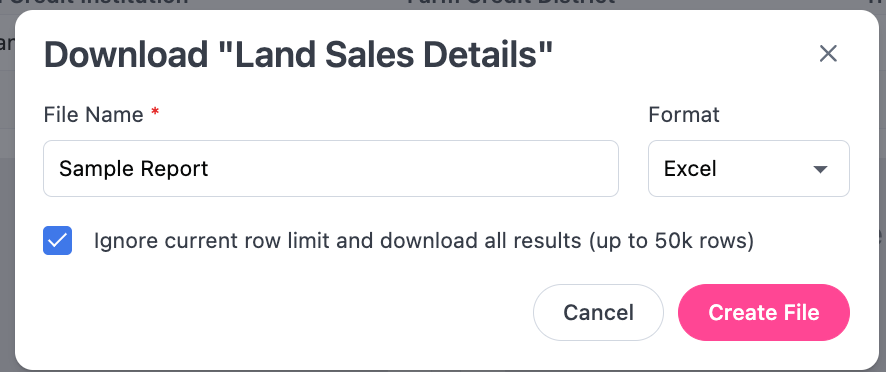
Downloading Data Tables
Scroll to the top of the page until you see the Download modal
- File Name: You have the option to rename the file before downloading
- Format: Select the file format
- If there are more than 500 lines of data check the box next to “Ignore current row limit and download all results”