Before getting started with creating customer map layers for your organization, please review the following information to help you plan appropriately.
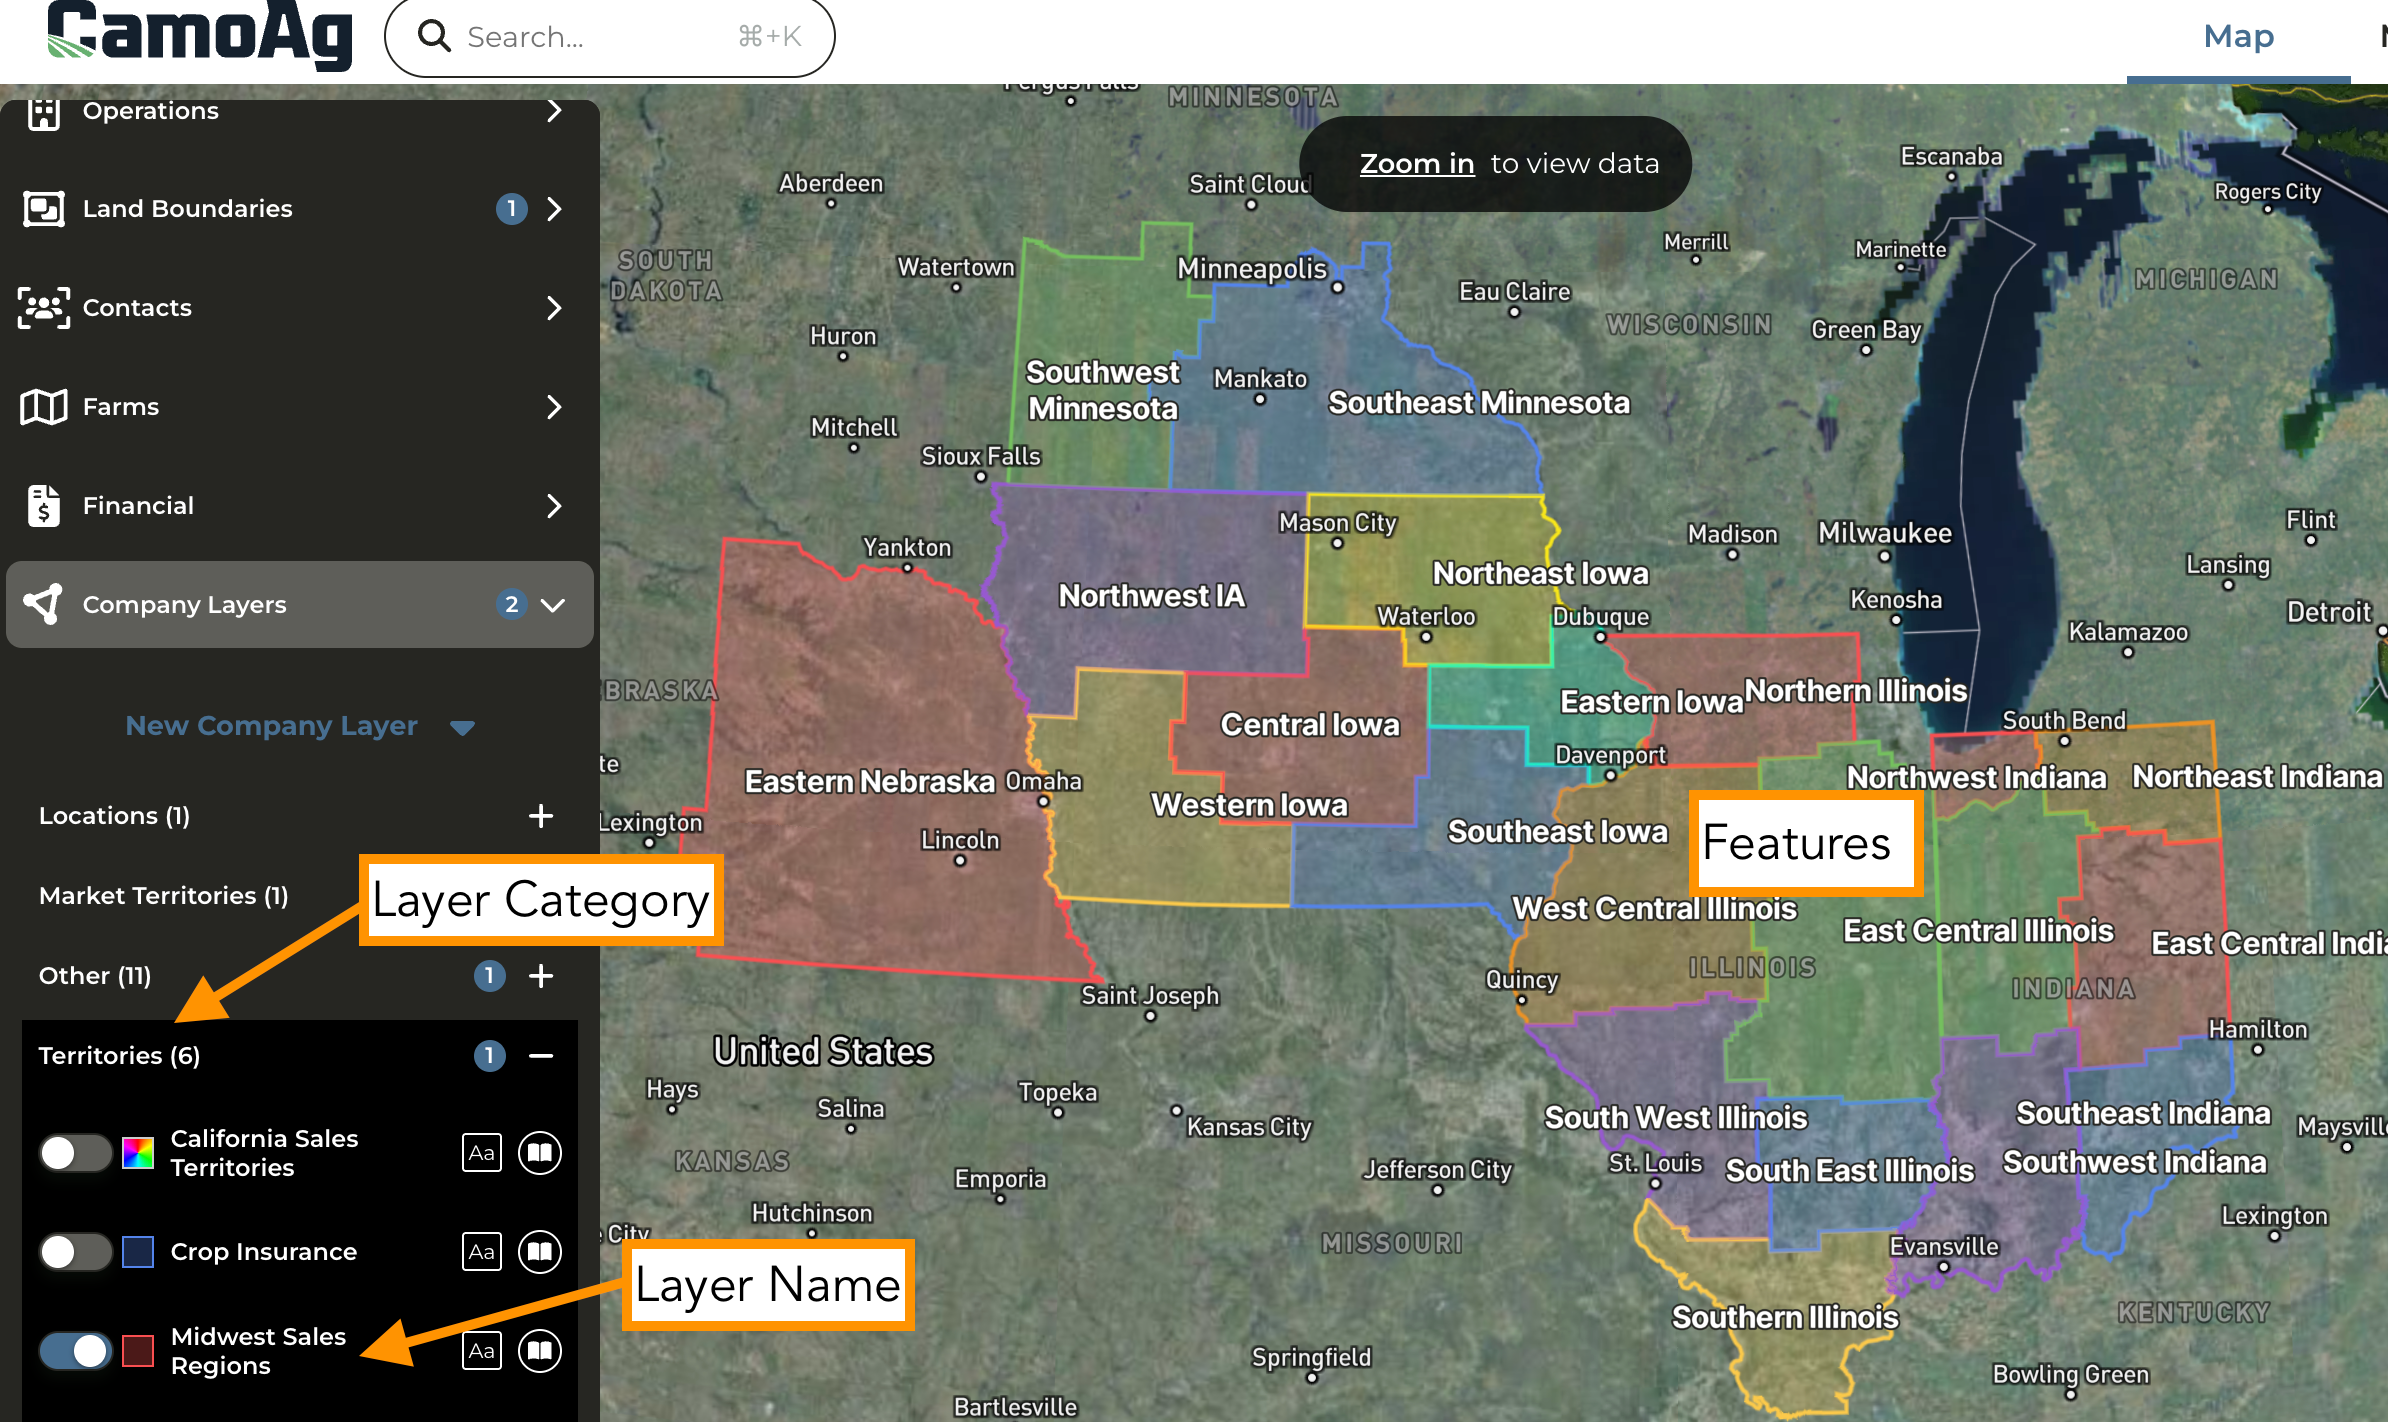
Layer Category: Think of this as how you will categorize your layers
Layer Category
Example 1
Territories
Example 2
Weather Events
Layer Name: Assign a more defined name for the map layer. The Layer Name can be toggled on or off on the map.
Layer Category
Layer Name
Example 1
Territories
Midwest Sales Regions
Example 1
Territories
Insurance Regions
Example 2
Weather Events
California Wildfires
Example 2
Weather Events
Hail Storms
Features: Layer features is where you actually define the boundaries and further define the feature. When you enable a Layer Name, all Features added to that Layer Name will appear on the map.
Layer Category
Layer Name
Features
Example 1
Territories
Midwest Sales Regions
Southeast Iowa
Example 1
Territories
Midwest Sales Regions
Central Iowa
Example 1
Territories
Insurance Regions
Southern Minnesota
Example 1
Territories
Insurance Regions
MS River Valley
Example 2
Weather Events
California Wildfires
Coyote Fire
Example 2
Weather Events
California Wildfires
Gifford Fire
Example 2
Weather Events
Hail Storms
Central Iowa
Example 2
Weather Events
Hail Storms
Northwest IL
Attributes: Optional field that allows you to add attributes to each feature layer. For example, you may want to include an attribute titled “Region Leader” and define who is responsible for each area defined.
Check out the below example of what a completed custom map layer might look like.
Last modified on September 23, 2026
Assistant
Responses are generated using AI and may contain mistakes.