> ## Documentation Index
> Fetch the complete documentation index at: https://docs.camo.ag/llms.txt
> Use this file to discover all available pages before exploring further.
# Creating Free Drawn Custom Map Layers
***Requires Pro Subscription***
***\*Requires Organization Edit or Admin permissions***
### **Terms to Know**
* **Layer Category:** The Layer is the category under which the features will exist. Some layer examples could be: Territories, Weather Events, Water Districts, and Office Locations to name a few.
* **Layer Name:** Assign a more defined name for the map layer. The Layer Name can be toggled on or off on the map.
* **Features:** Layer features is where you actually define the boundaries and further define the feature. When you enable a Layer Name, all Features added to that Layer Name will appear on the map.
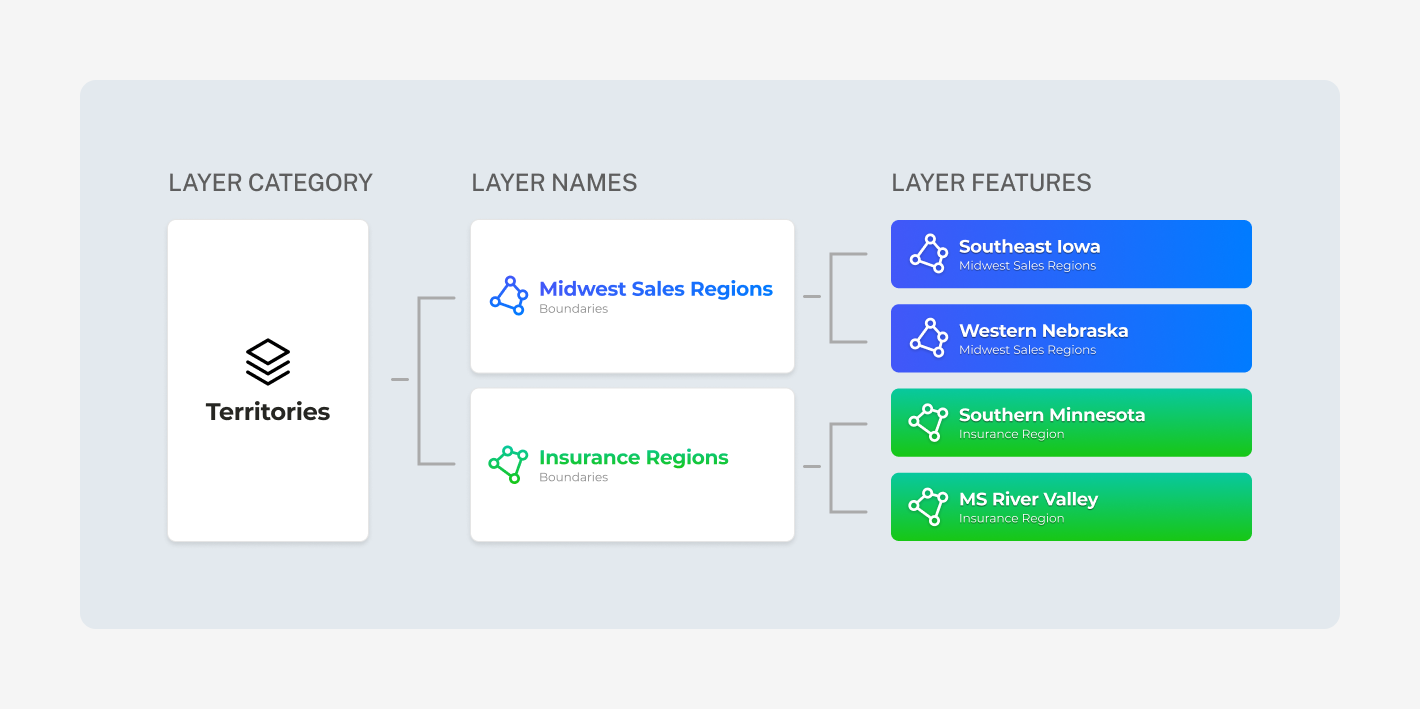
#### **Please review the** [**Planning Your Custom Map Layers**](/hc/en-us/articles/34320394518679-Planning-Your-Custom-Map-Layers) **guide before getting started**
Navigate to the Map
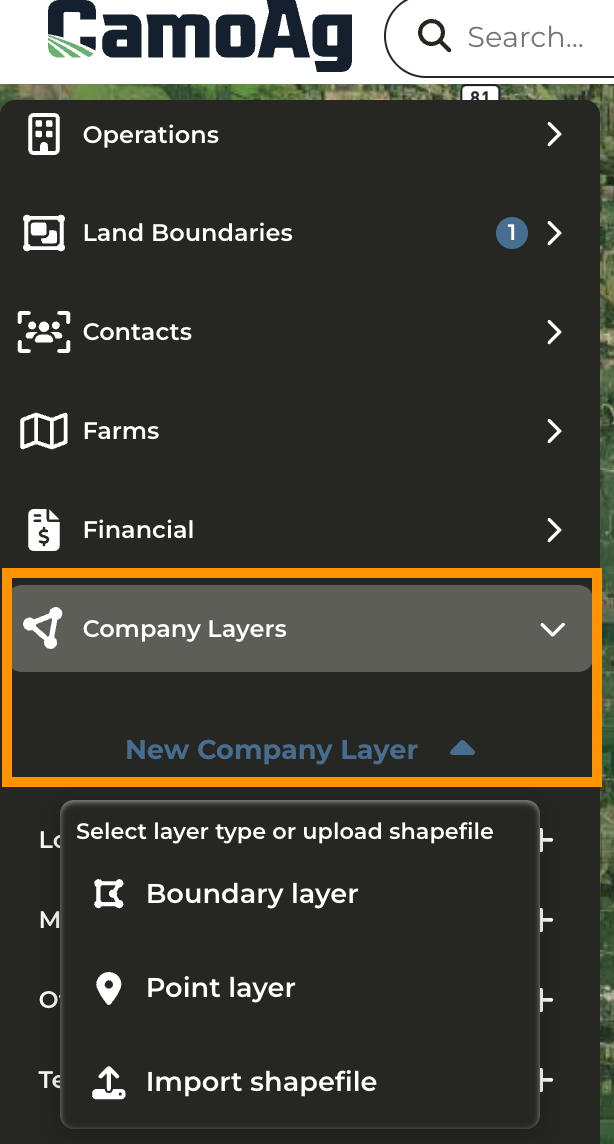
Click **Company Layers > New Company Layer** and select **Boundary Layer**
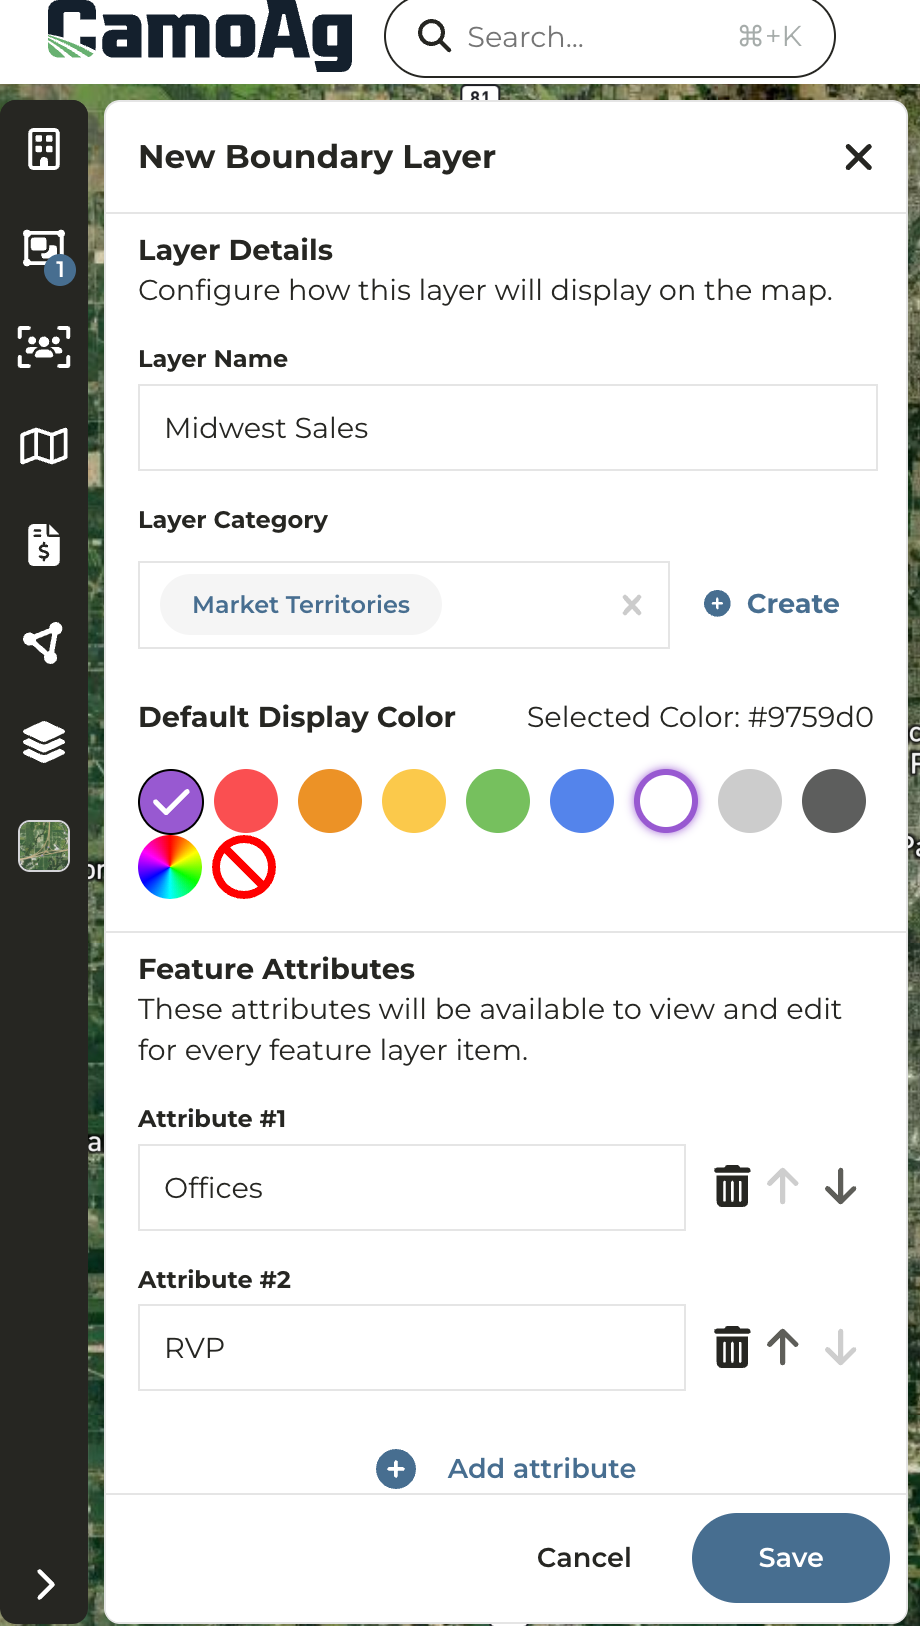
Assign a **Layer Name**
Next, assign a **Layer Category** or **Create a New Category**
Select a display color for the **Layer Name**
Click **Save**
Click **Add feature to layer**
Click **Enable** to the right of **Boundary edit tools** then click **Draw Polygon**
On the map click to drop a point of where you want to begin drawing. Moving in a clockwise or counter-clockwise direction, continue to drop points by clicking your mouse.
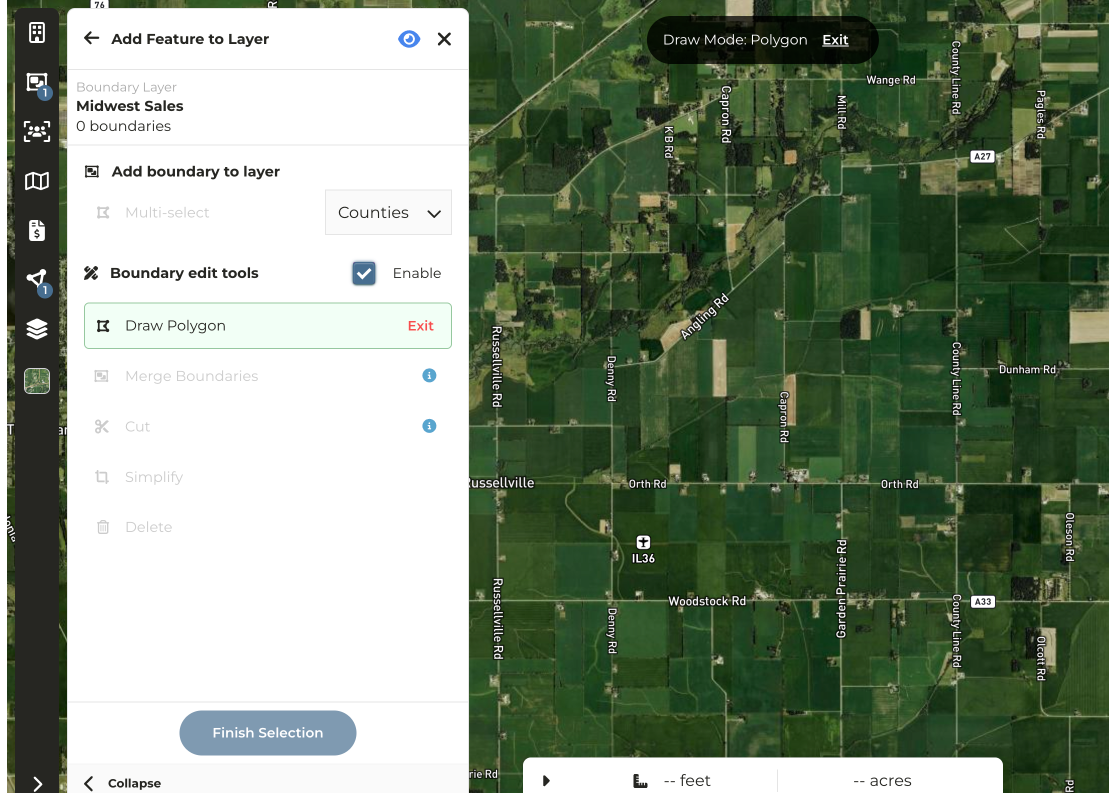
Once you have completed your drawing **double-click** to end
Click **Finish selection**
Enter a **Feature Name** and **Color.** *Note: When the Layer Name is enabled this is the color that will be assigned to this feature*
Click **Save**
Click the back arrow to the left of **Selected Feature** and repeat steps 8-15 until you have added all Features to this Layer