> ## Documentation Index
> Fetch the complete documentation index at: https://docs.camo.ag/llms.txt
> Use this file to discover all available pages before exploring further.
# Creating and Editing a Contact
* No, the intent of this feature is for users to be able to add contact information for a customer or prospect as needed and quickly find it on the map or in a report.
* Once you have created a contact, the contact marker flag will appear on the map at the address entered. This means if you click on a parcel in Dekalb, Illinois and the owner address is located in Cedar Rapids Iowa, the contact marker flag will appear at the address in Iowa.
* Yes - review the [Contacts Pro Report](/hc/en-us/articles/25955119653911-Contacts-Report) and [Using the Contacts Map Layer](/hc/en-us/articles/26486469022359-Viewing-Contacts-on-the-Map-or-Contacts-Dashboard) for more details
* CRM contact information will appear as read only in CamoAg. Any edits made to contact information must be done in your CRM.
* If you create a contact in CamoAg and later add that information to your CRM, the data from your CRM will override the information in CamoAg and become read-only
[**Creating a Contact on the Map**](#creating-a-contact-from-the-map) - This option will pull in the name and address information associated with the party allowing you to manually enter phone, email, and DOB.
[**Creating a Contact on the Dashboard**](#creating-a-contact-on-the-contact-dashboard) - This option requires you to manually enter contact information such as address, name, and phone number.
### Creating a Contact from the Map
When creating a contact from the map address information it is not editable. If you want to create a contact with an address different from what you see steps below:
Locate the person you want to add as a contact using one of the methods below:
* Use the search tool and click through to the results on the map
* Enable the Operations > Producer layer and click on an operation on the map
* Click on a parcel and under **Connections** click on the name of the **Operation**
Click **Save to Edit**
The operation is now saved as a Prospect.
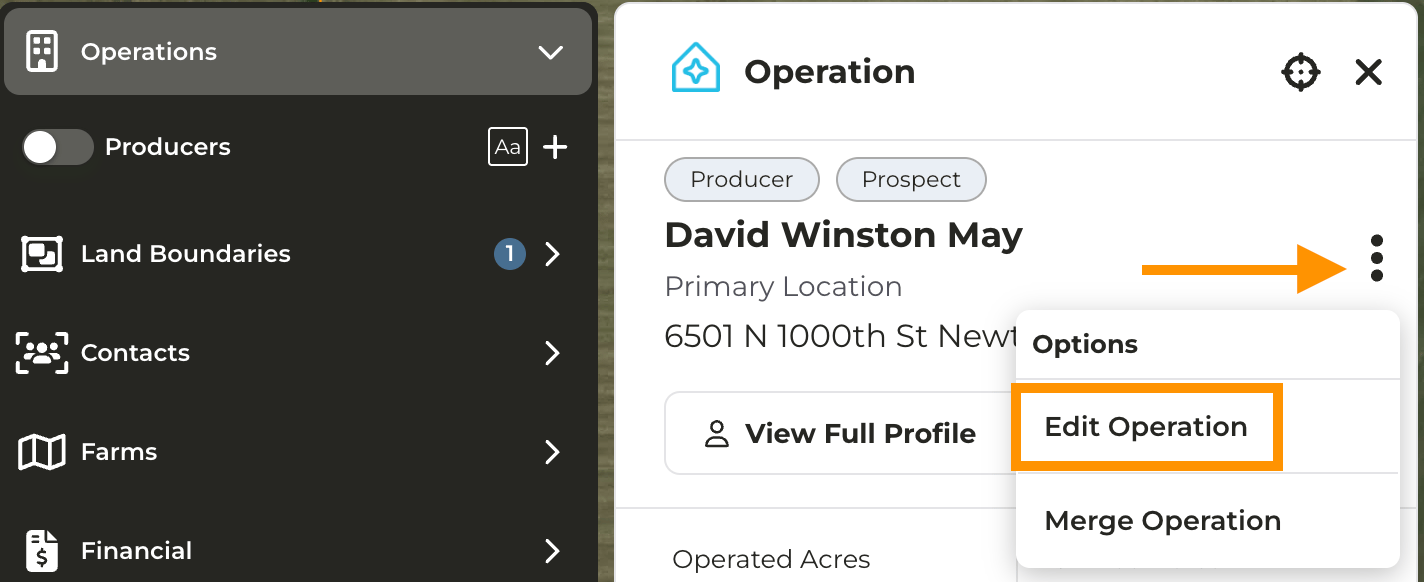
* Edits can be made to the **Operation** details such as Operation Category or Estimated Operated acres
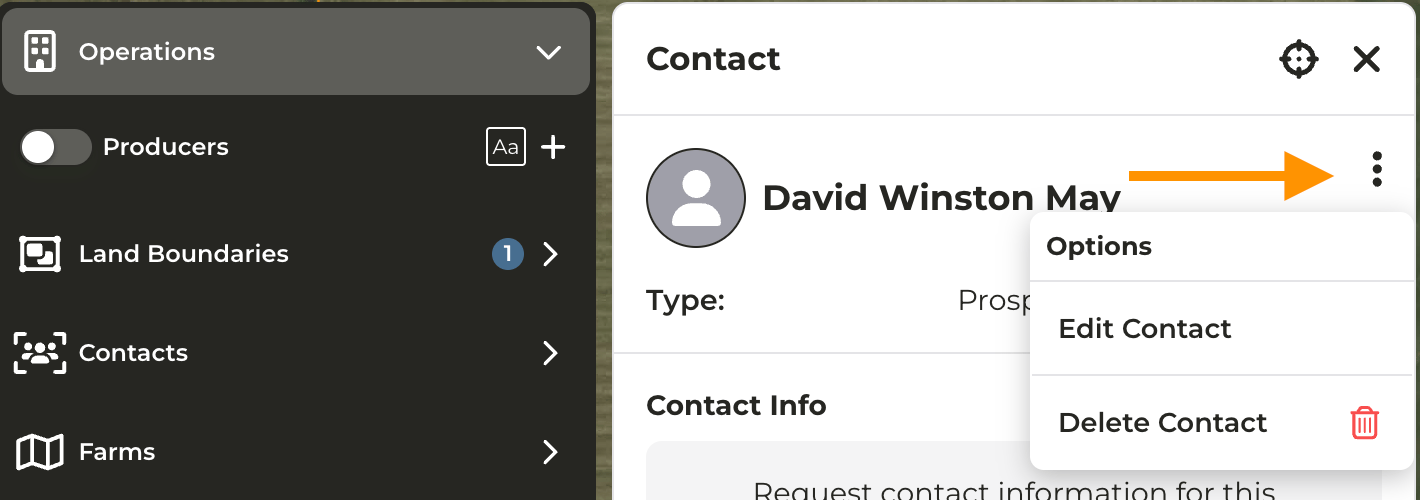
 * Edits can be made to the **Contact** details by expanding **Connections** and clicking the contact name then **Edit Contact.** Once edits have been made click **Save Contact.**
 You can now view your contact on the map when the Contacts layer is enabled, on the Contacts Dashboard, and on the Contacts Report. Reminder, that when you create a contact, the marker will save on the map at the address location, which may differ from the parcel location.
### Creating a Contact on the Contact Dashboard
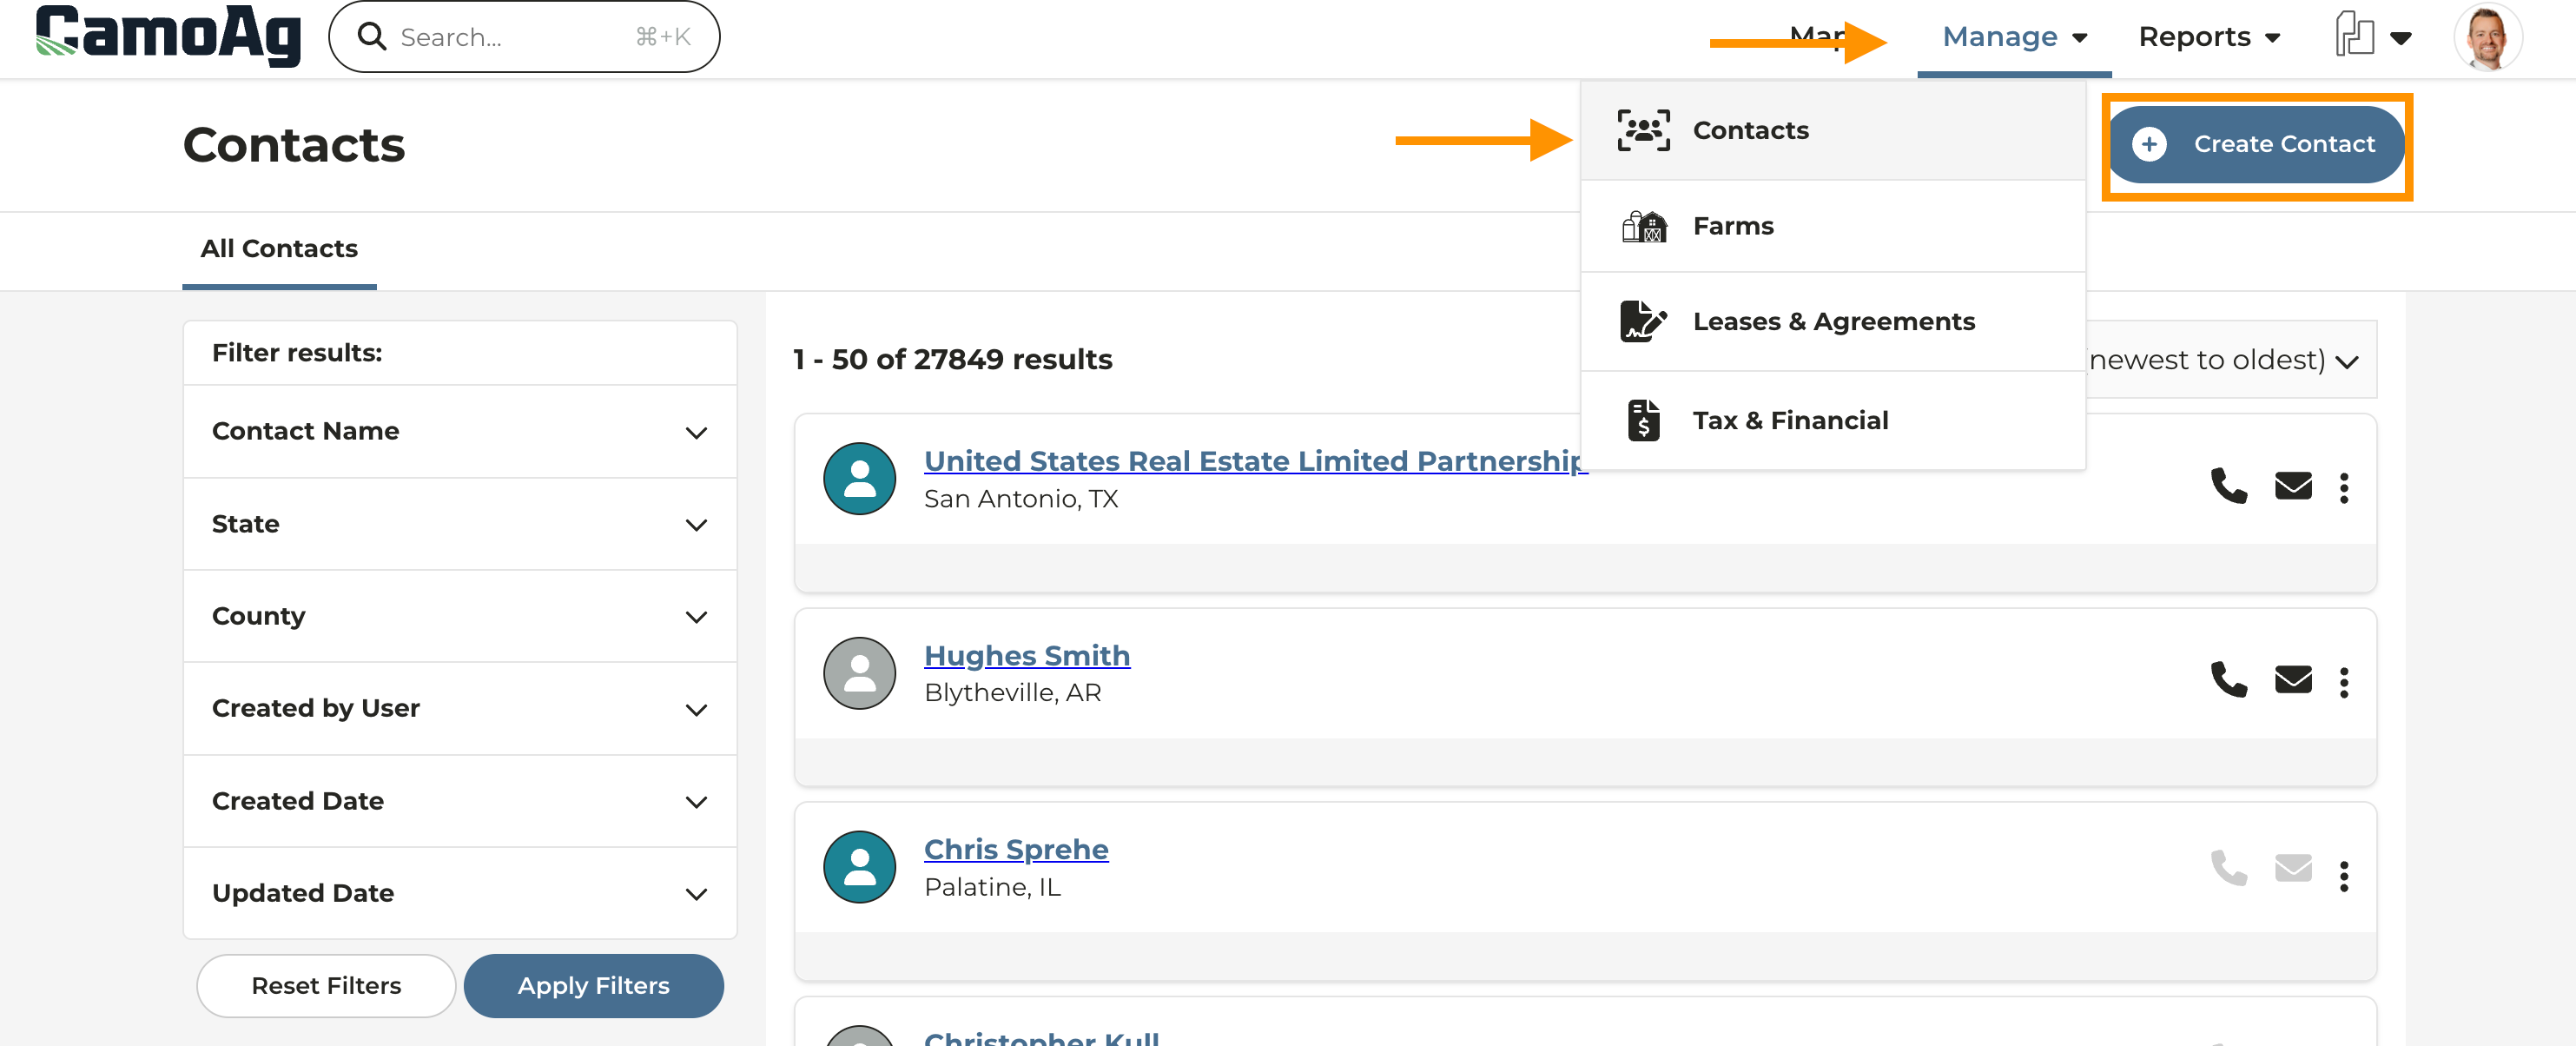
Click **Manage > Contacts**
Click **Create Contact**
Click **+Add Address** and either search for the address and pick from the suggested addresses or manually enter the address and click **Save Address**
Enter remaining contact details
* Contact Name - required
* Contact Type - optional drop down
* Phone and Email - optional
* Age or DOB - optional
Click **Save Contact**
You can now view your contact on the map when the Contacts layer is enabled, on the Contacts Dashboard, and on the Contacts Report. Reminder, that when you create a contact, the marker will save on the map at the address location, which may differ from the parcel location.
### Creating a Contact on the Contact Dashboard
Click **Manage > Contacts**
Click **Create Contact**

Click **+Add Address** and either search for the address and pick from the suggested addresses or manually enter the address and click **Save Address**
Enter remaining contact details
* Contact Name - required
* Contact Type - optional drop down
* Phone and Email - optional
* Age or DOB - optional
Click **Save Contact**