> ## Documentation Index
> Fetch the complete documentation index at: https://docs.camo.ag/llms.txt
> Use this file to discover all available pages before exploring further.
# Adding a Property To Your Account Using Farm Builder
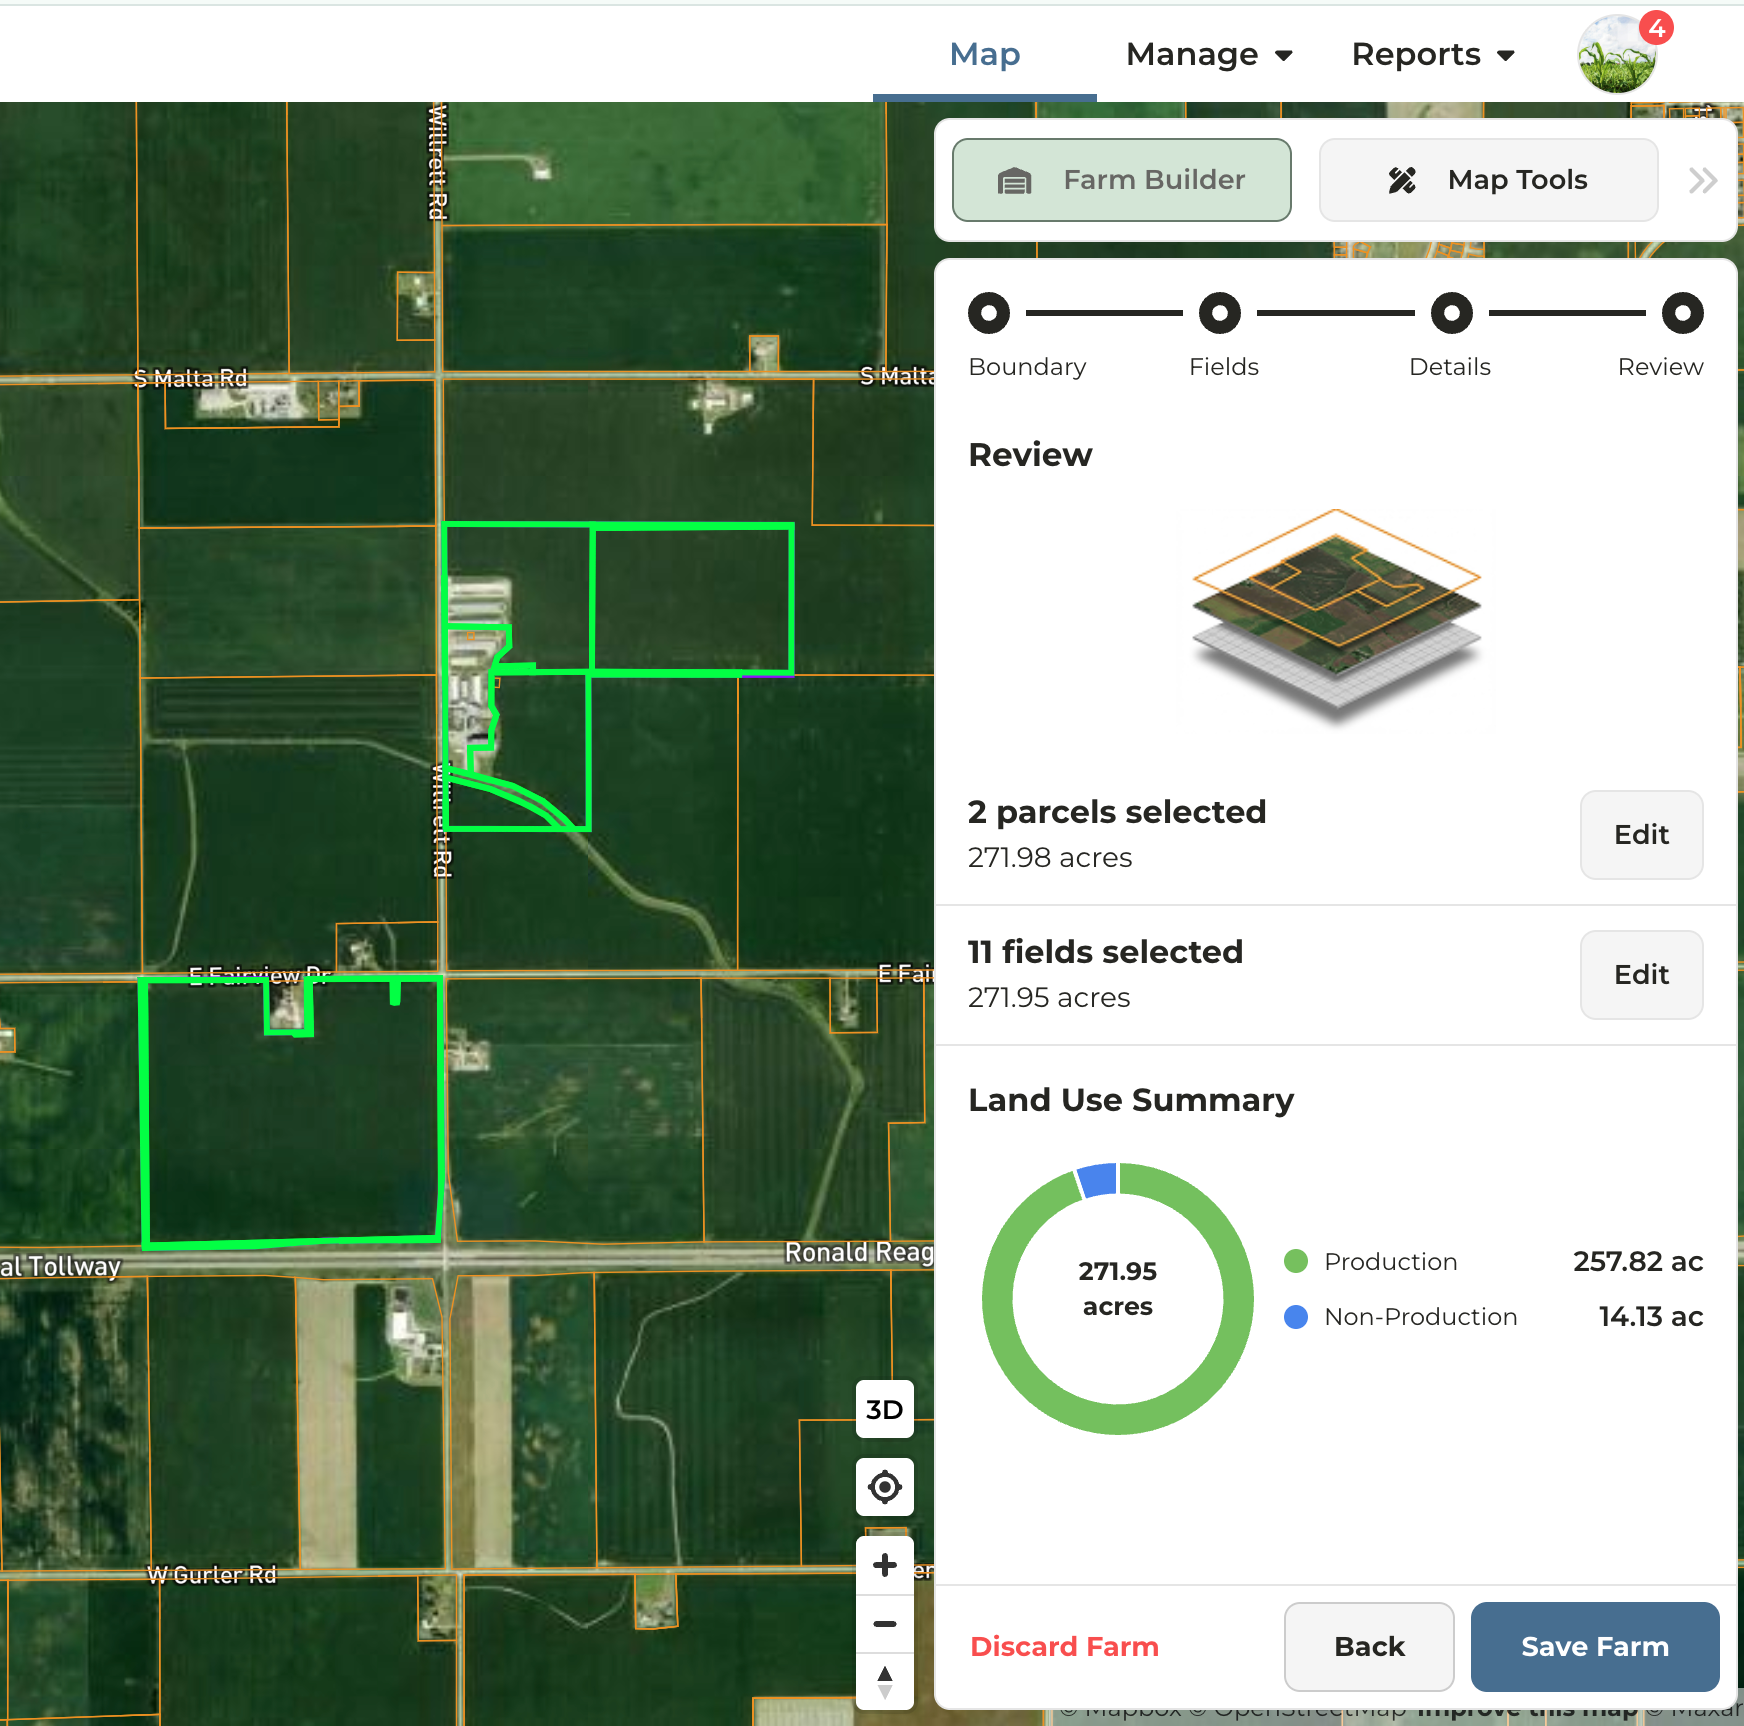
#### **The Farm Builder workflow consists of four sequential steps:**
Select the parcel(s) to be included in the farm.
Choose whether to generate fields from parcel boundaries or from CLU fields.
***Note:** CLUs, or Common Land Units, were last made publicly available by the USDA in 2008 and are not used by all states.*
[*FSA CLU Datasheet*](https://www.fsa.usda.gov/sites/default/files/documents/clu_infosheet_2017_Final.pdf)
Rename fields and modify acre types as needed.
Review all farm details and make any necessary edits prior to saving.
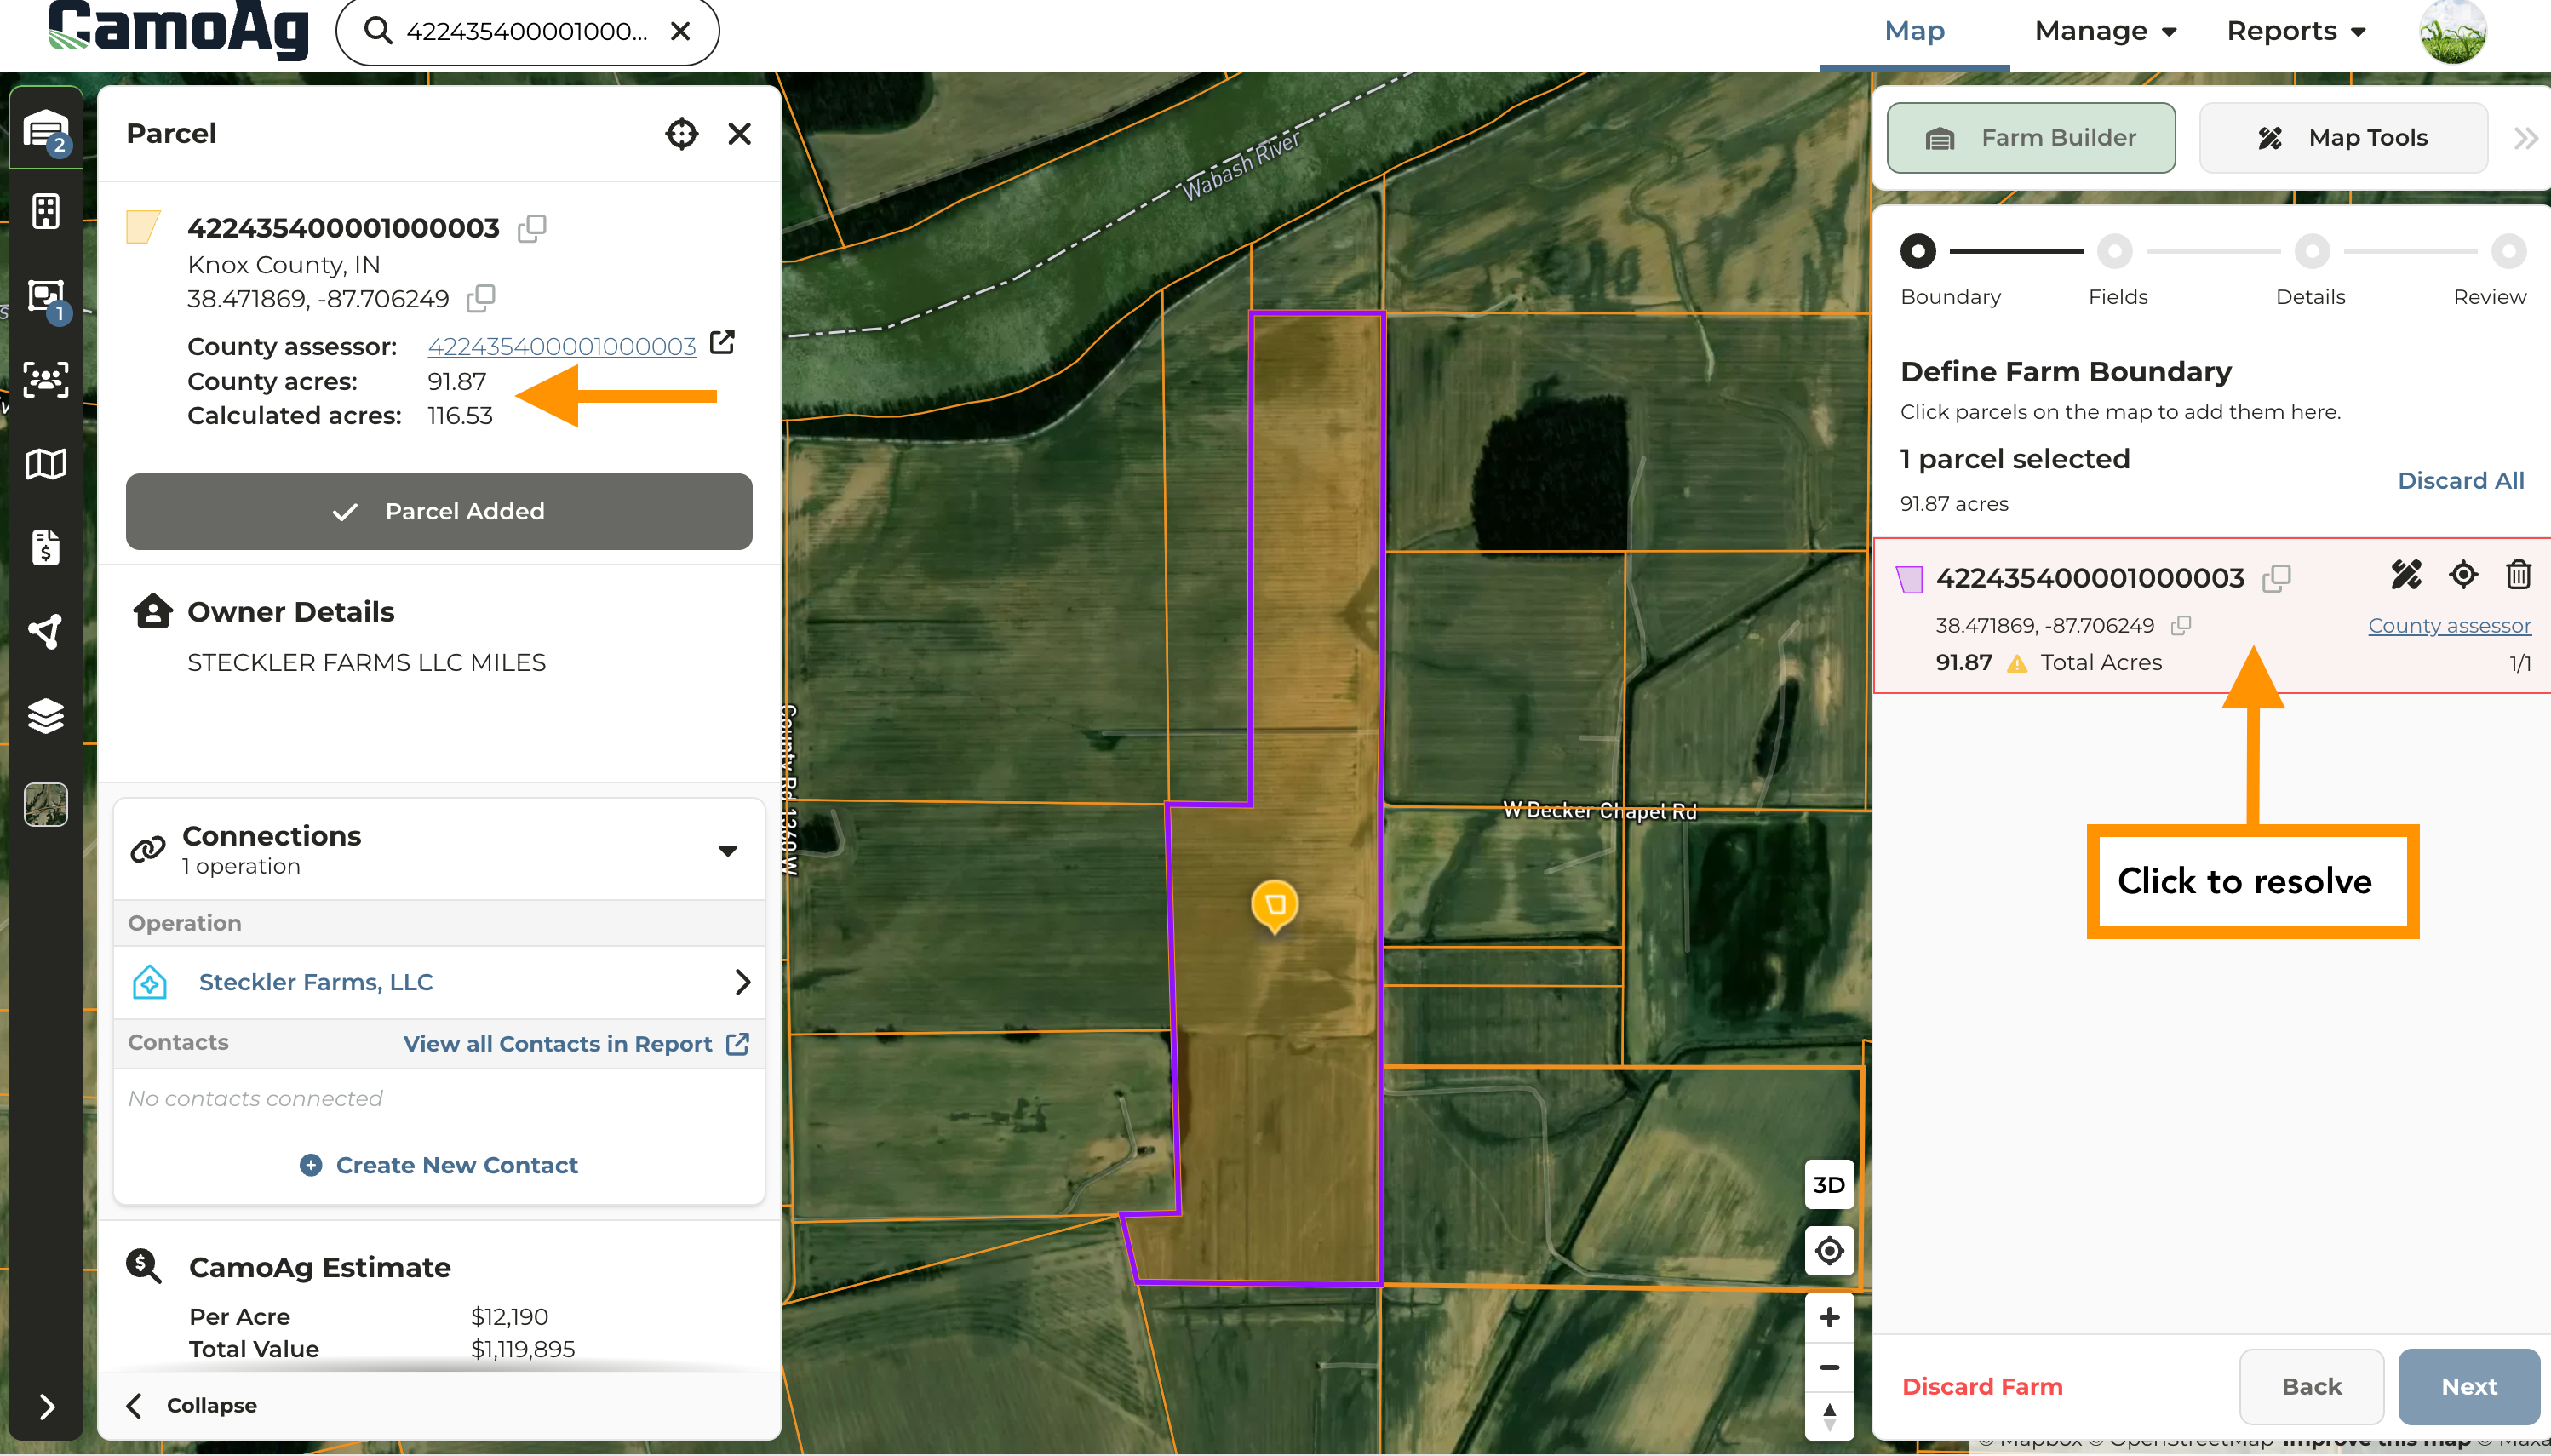
#### **County Acres vs. Calculated Acres**
* **County Acres** represent the actual deeded acres according to county tax data
* **Calculated Acres** the estimated size of the parcel boundaries according to county GIS data
* For transparency purposes, CamoAg displays both County and Calculated acres
* Parcel geometry will automatically adjust to reconcile the calculated area with the recorded county deed acreage.
* Where the discrepancy between the calculated and recorded values exceeds 10%, the system will display a warning and require the user to perform a corrective action before proceeding.
#### **Using Map (Draw) Tools During Farm Building**
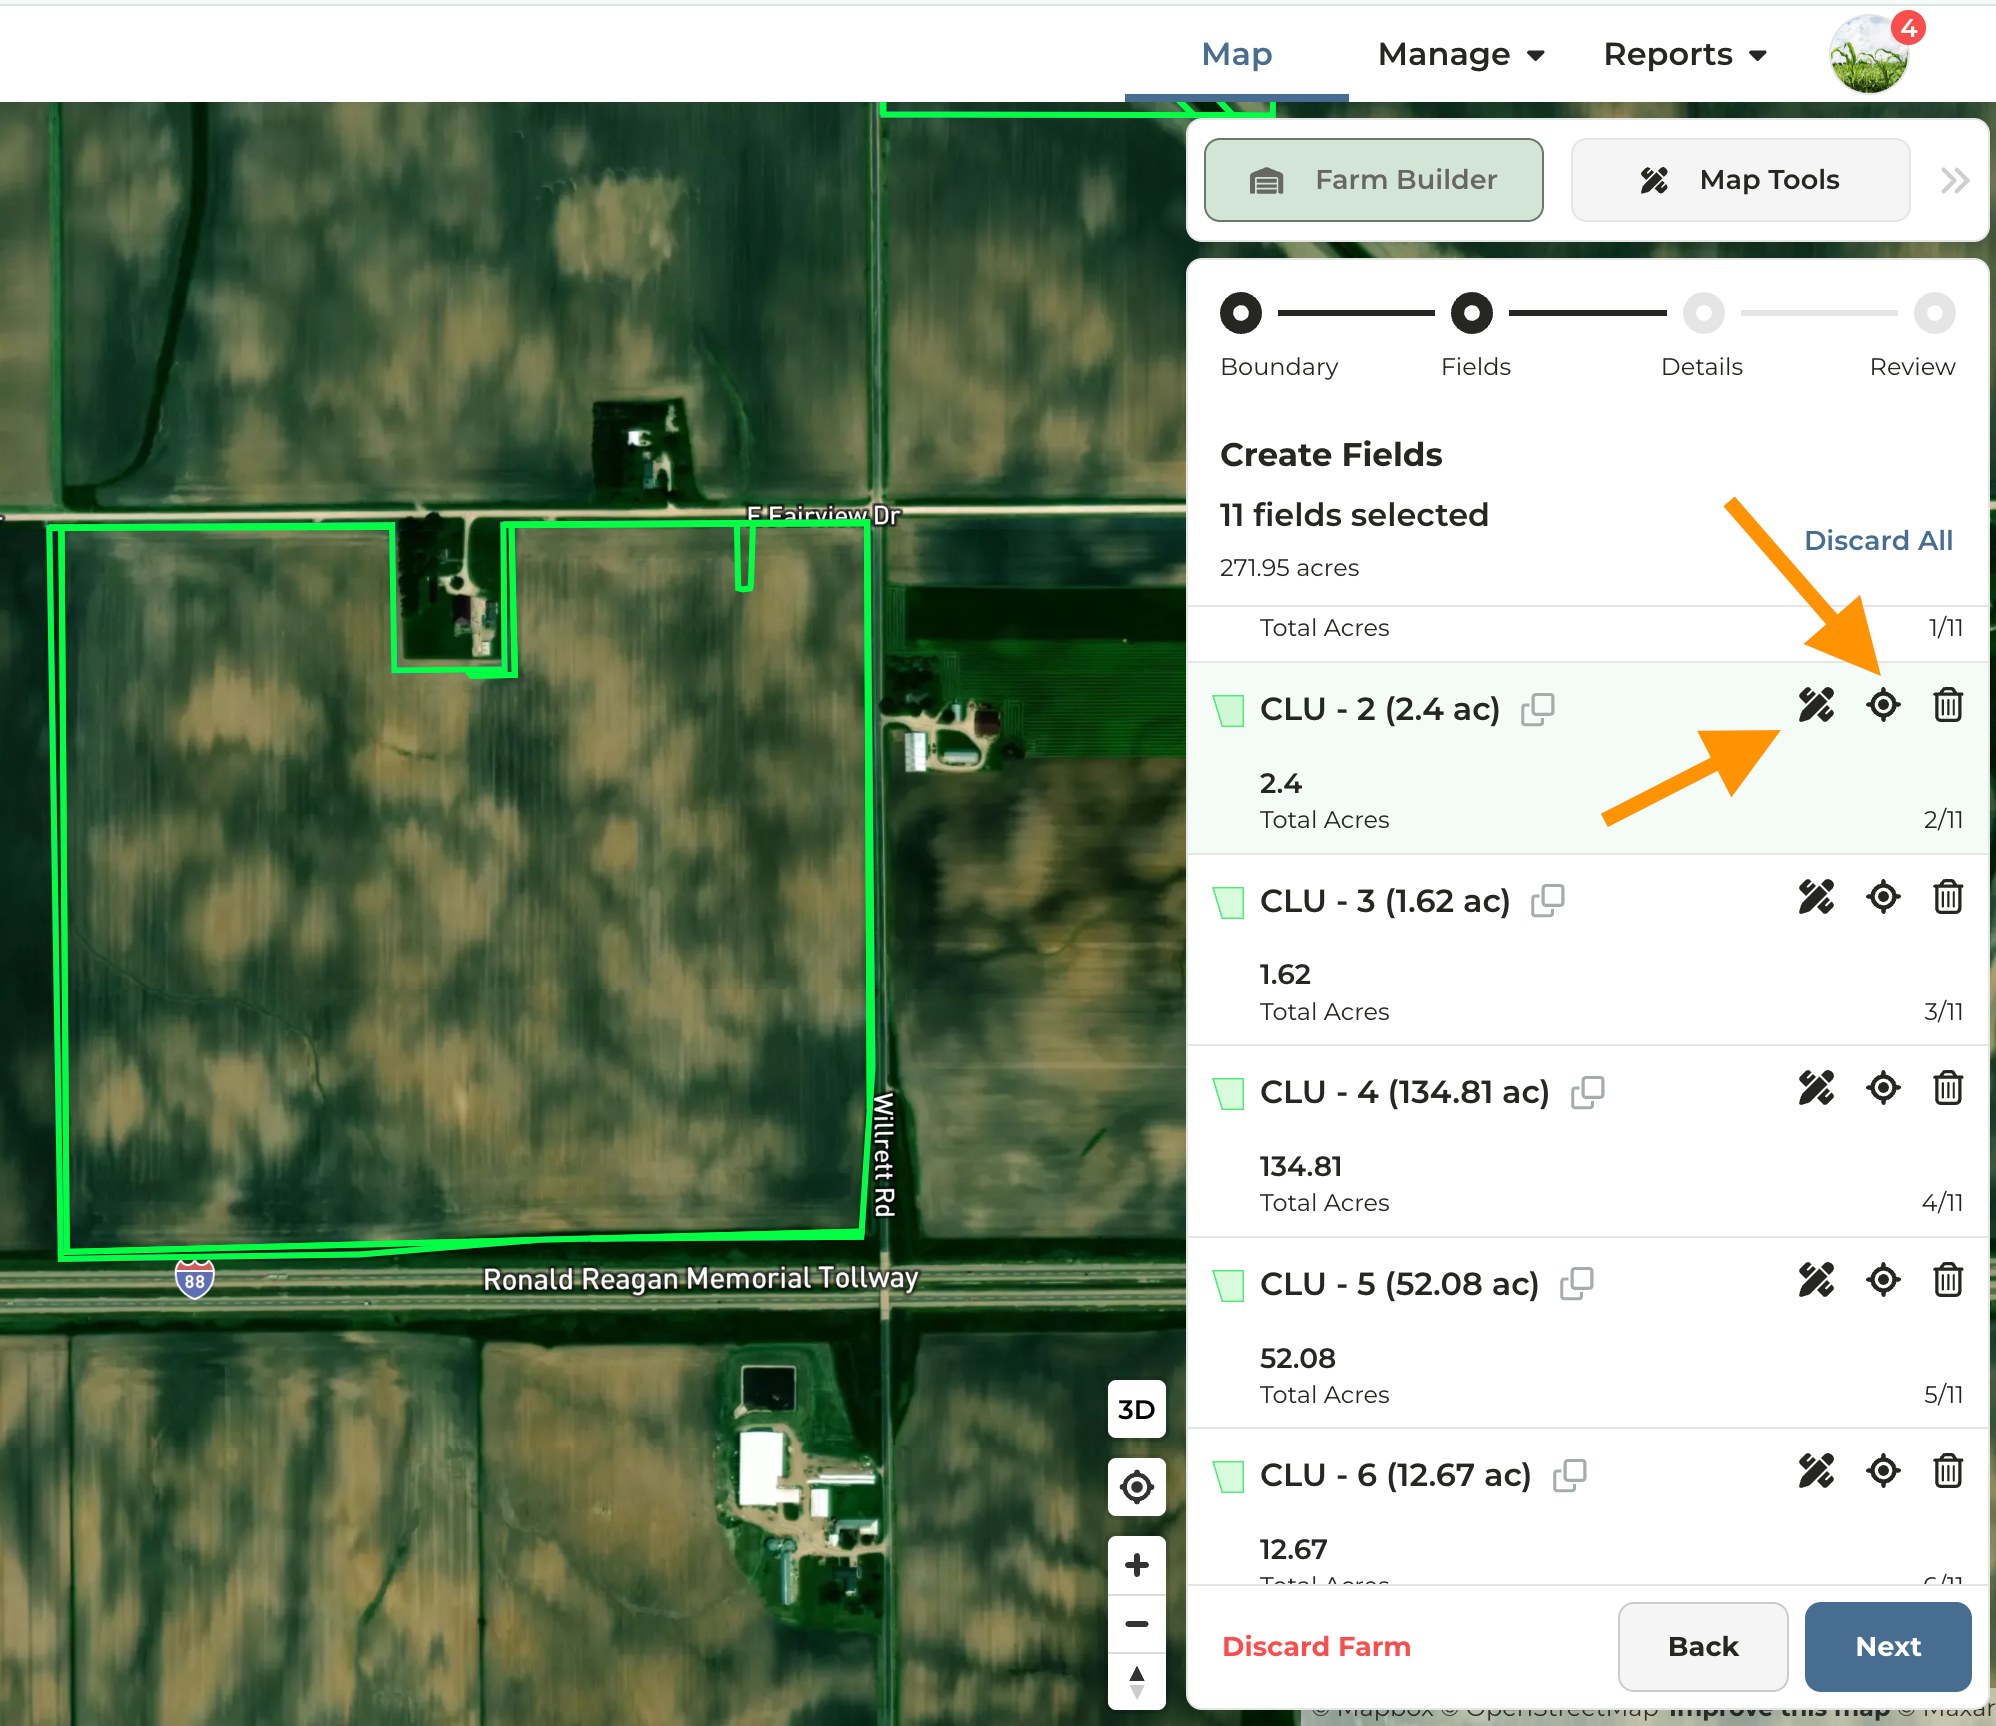
At any point during the farm building process, click the **Scope** icon to locate the desired boundaries on the map, then click the **Edit Tools** icon to begin editing the selected boundaries.
Review the [Map Tools](/hc/en-us/articles/39911598104471-Using-the-Map-Tools) guide for explanation of each map tool
### **Starting from Smart Search**
**Search for the parcel or entity name in the search field.**
* **Parcel ID** — Select the parcel ID from the search results. The corresponding parcel will be highlighted on the map. Click **Start from Parcel** and proceed to **Step 5**.
* **Name** — Select the name from the search results, then locate the desired parcel on the map. Proceed to **Step 2.**
### **Starting From the Map**
Navigate to the map and locate the desired parcel
In the upper-right corner of the map, click **Farm Builder**
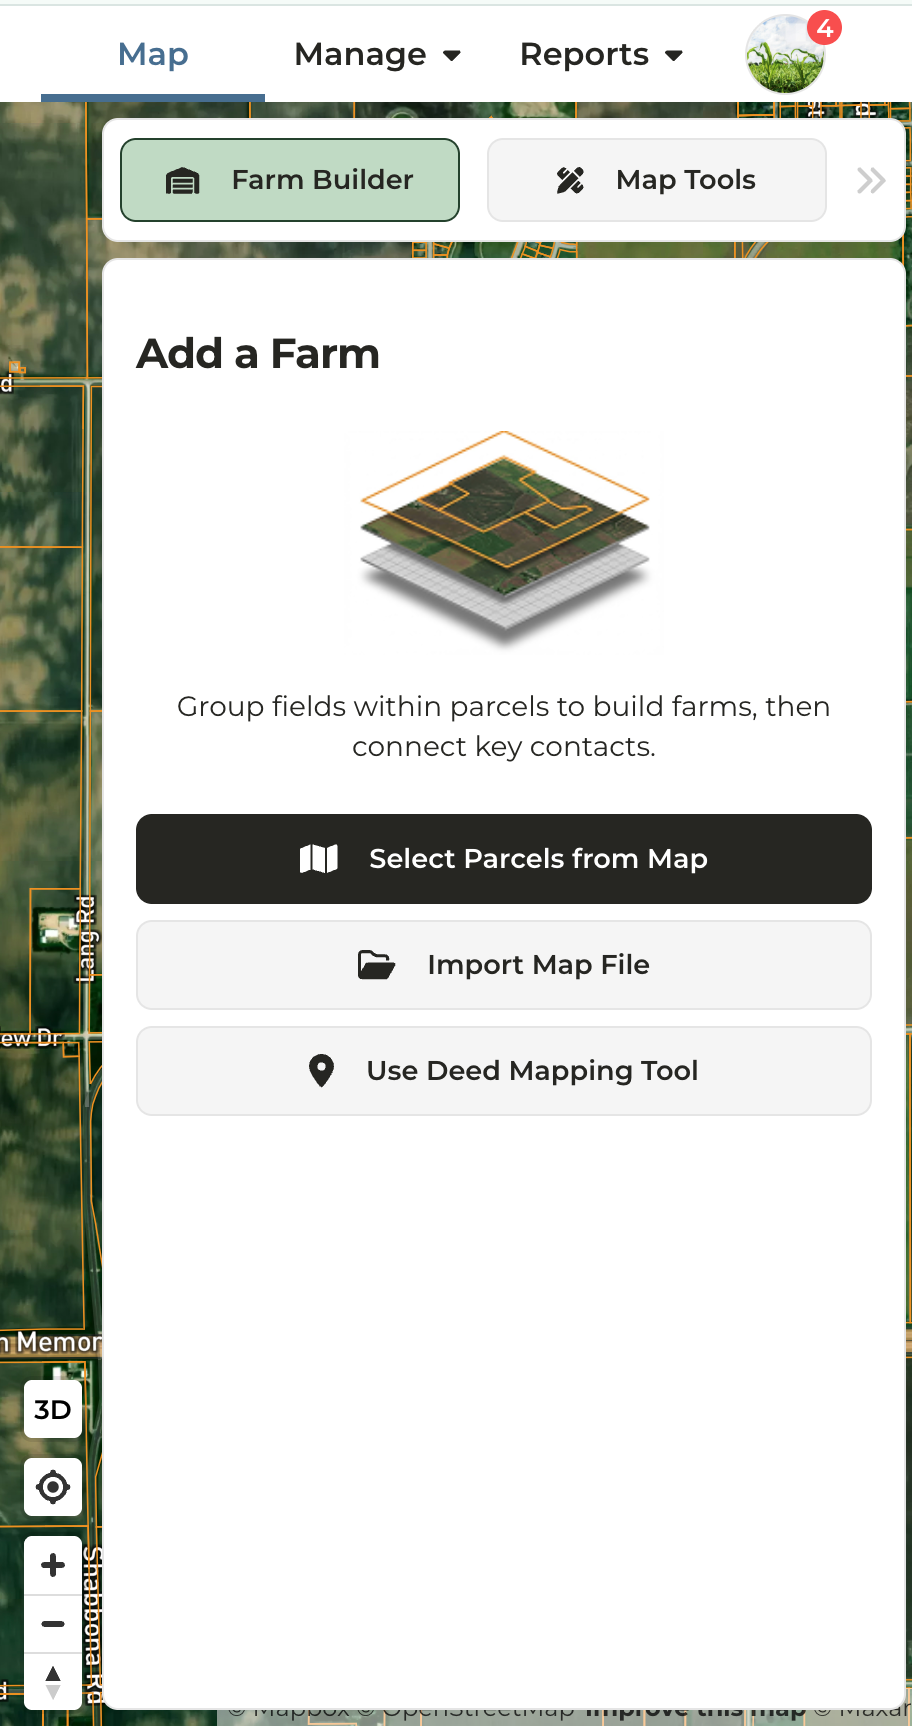
Click **Select Parcels from map**
On the map, click on the parcel(s) you want to work with
Click **Next**
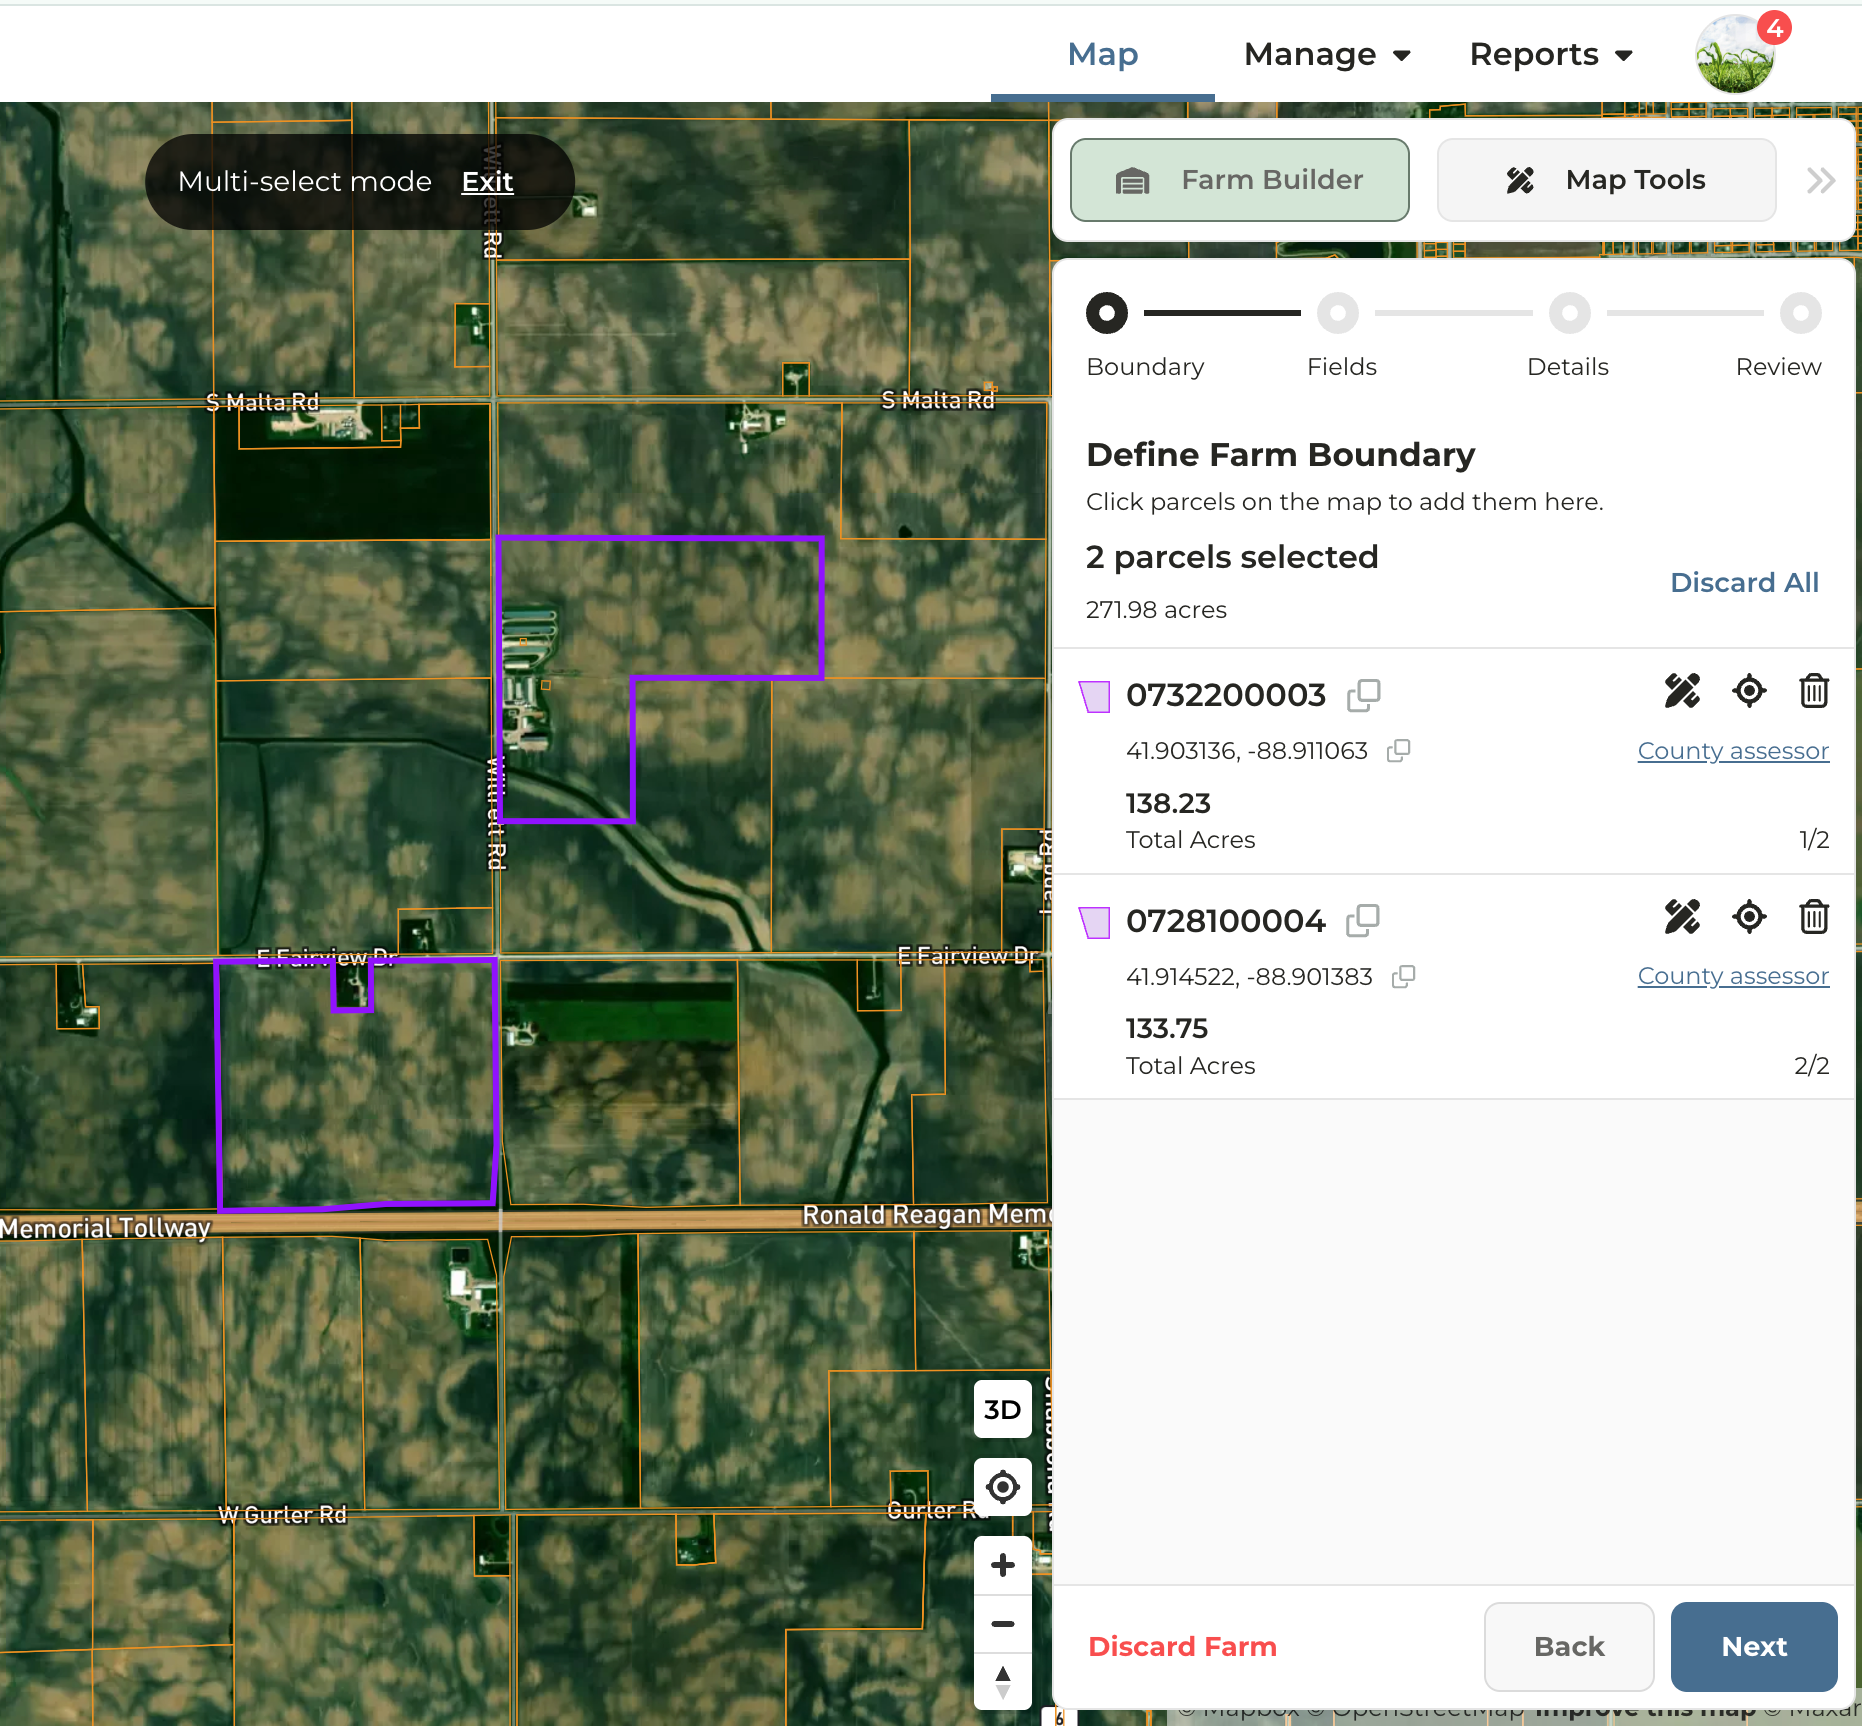
Select the desired boundary type for field creation — either **CLU Boundaries** or **Parcel Boundaries** — then click **Next.**
***Reminder:** Soil maps, crop history, and acre types (dryland, irrigated, woodland, etc.) are powered by fields. If you build a farm out of parcels only, this data will not be available until fields are added.*
**Details:** To rename fields or edit acre types, click **Next** at the top of the panel. If a property consists of only one parcel, renaming the field will rename the farm.
**Tip:** As you navigate through the fields, the selected field will be highlighted in blue.
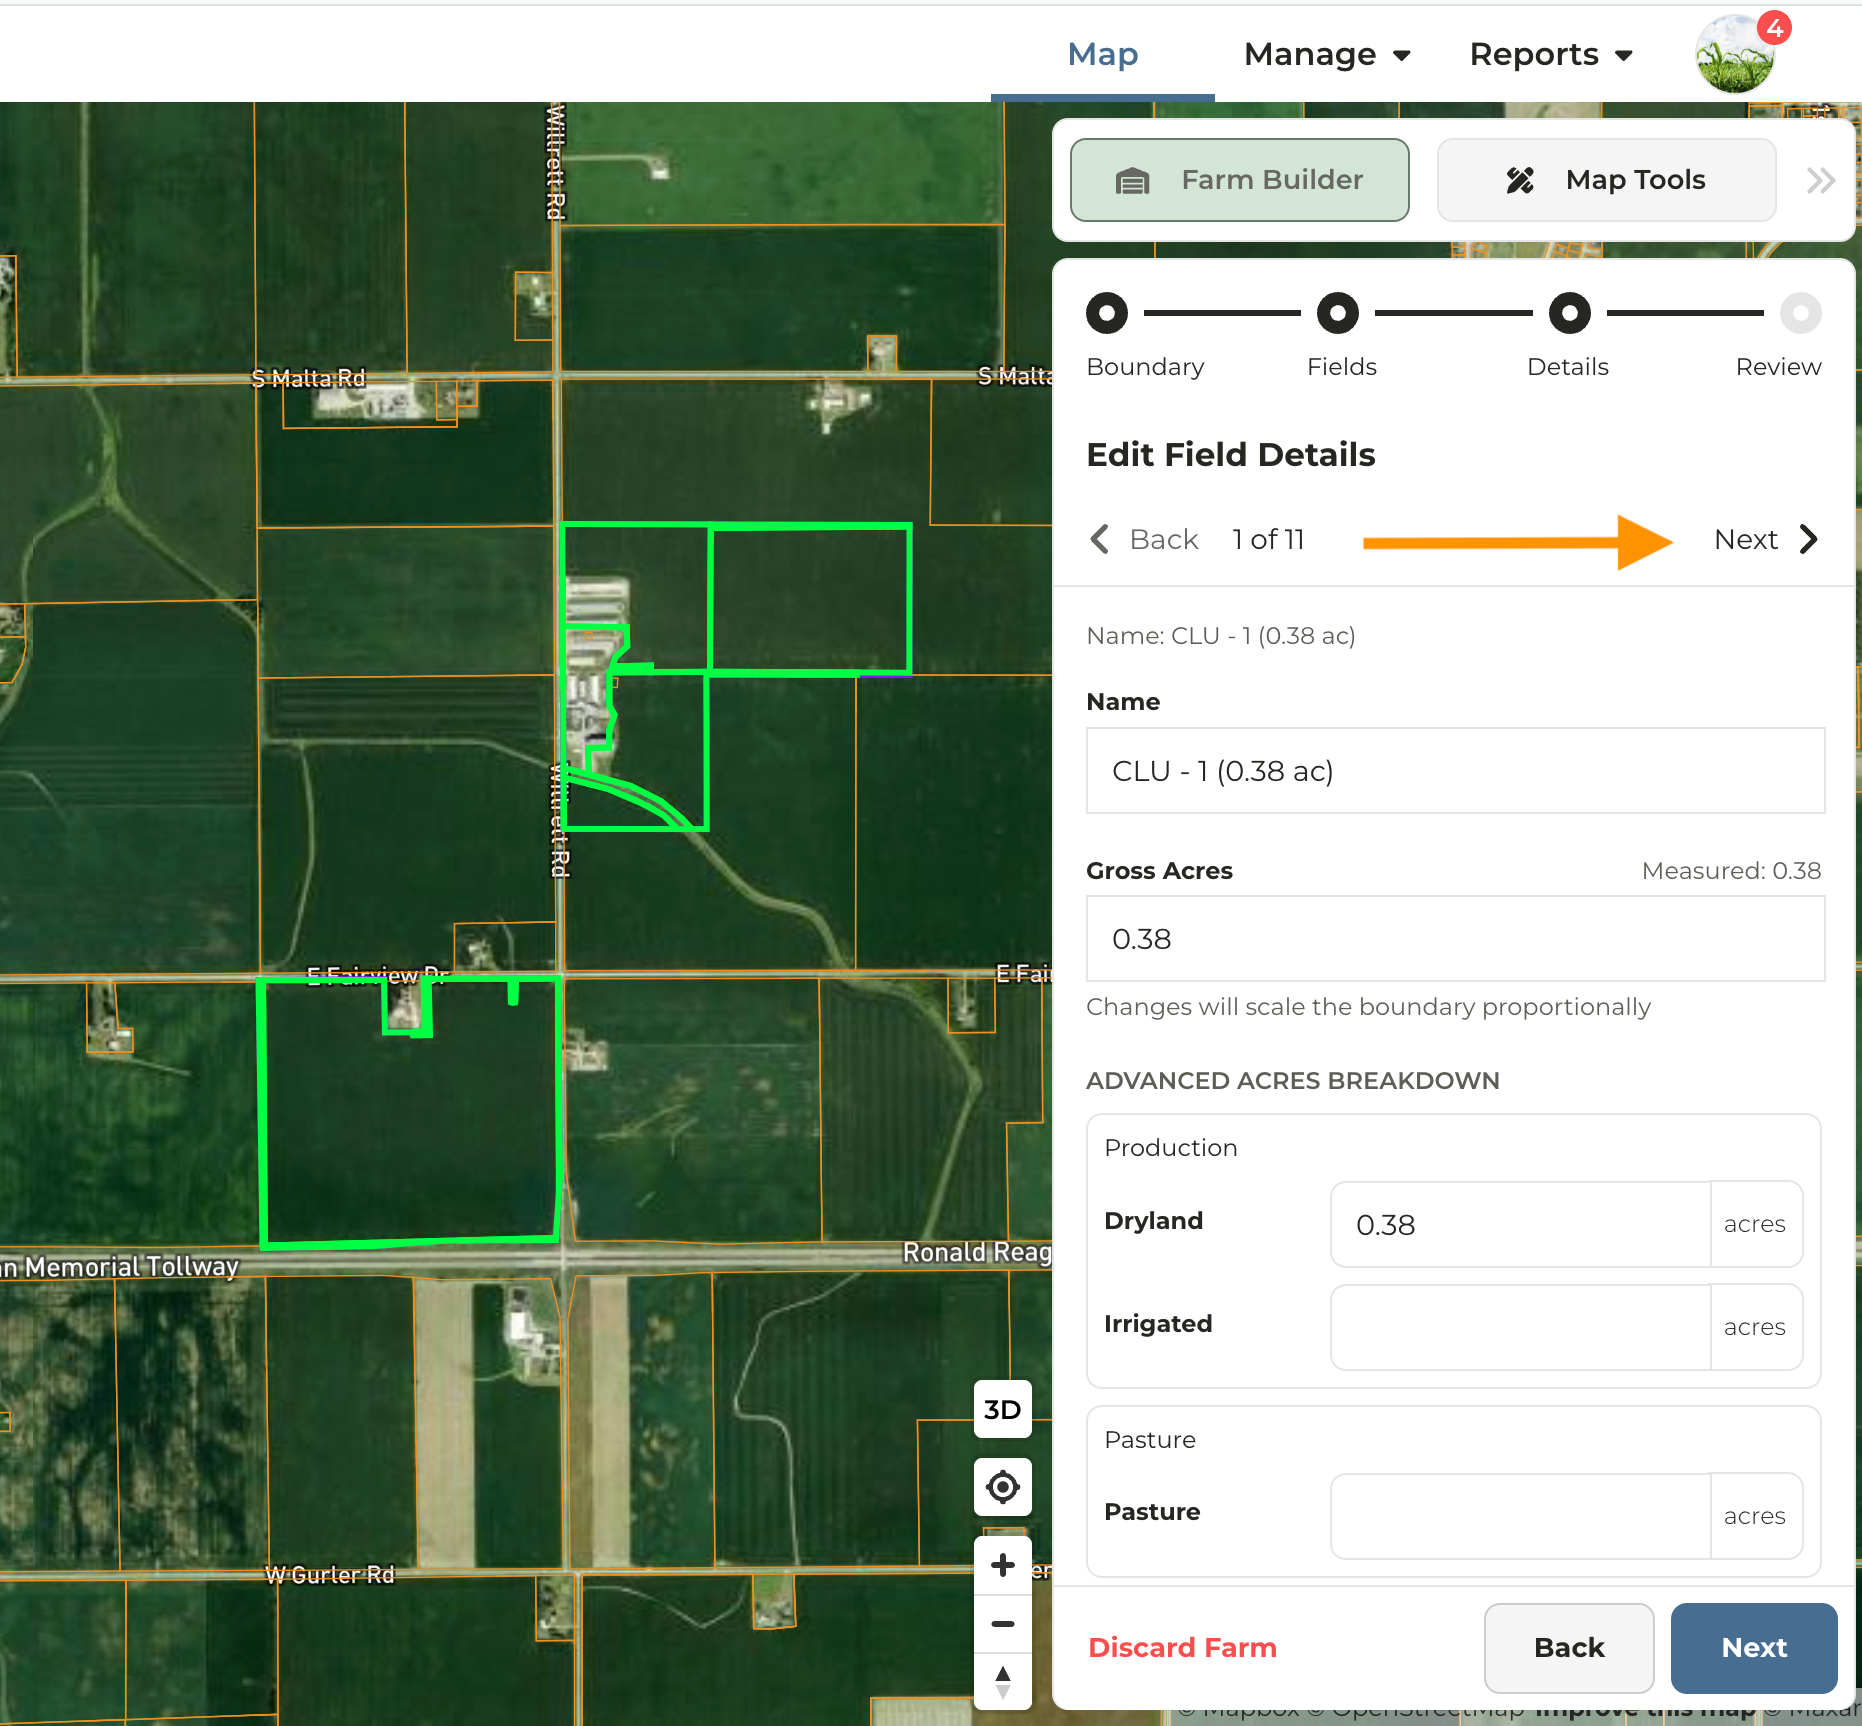
Review details and click **Save Farm**